Tags are a way to identify the actions a website vistor has taken or pages that were visited on your website. You can set a tag to be added to a subscriber if they visit a specific page in your website.
NOTE: You must have a email marketing form capturing the user information so the tag can be applied to the correct user.
Below are the steps for adding a tag to a visitor AFTER they have filled out an email marketing form.
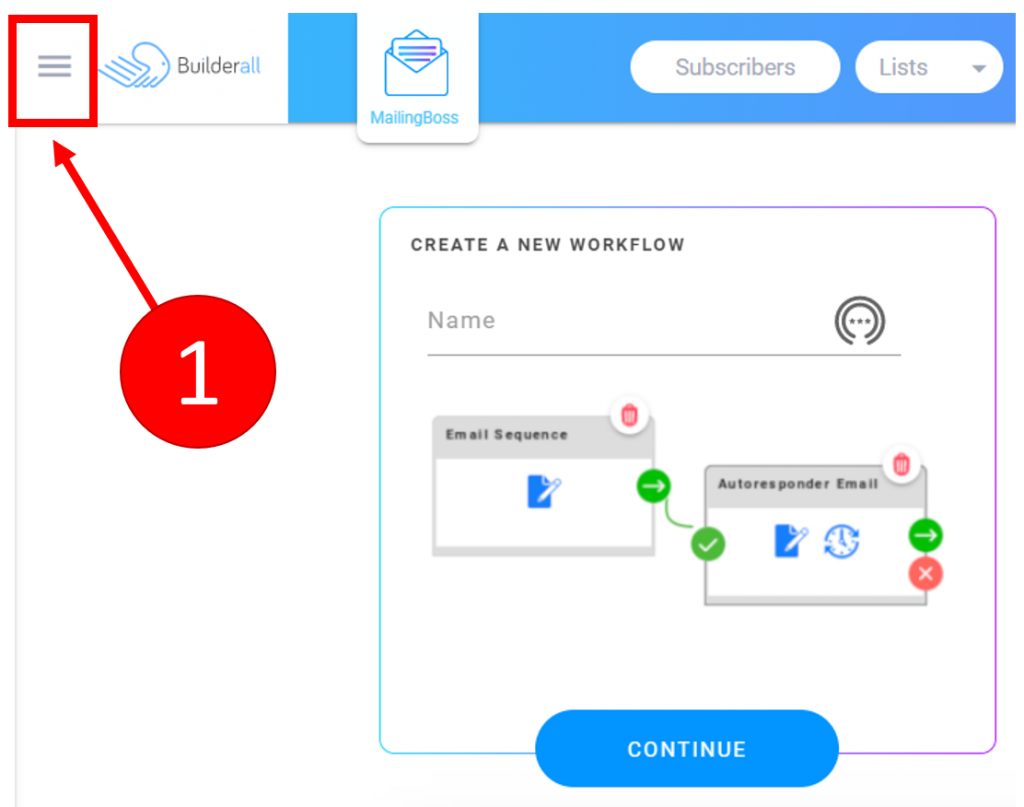
Step 1: Go to Mailing Boss and click the triple lines at the top left of the screen.
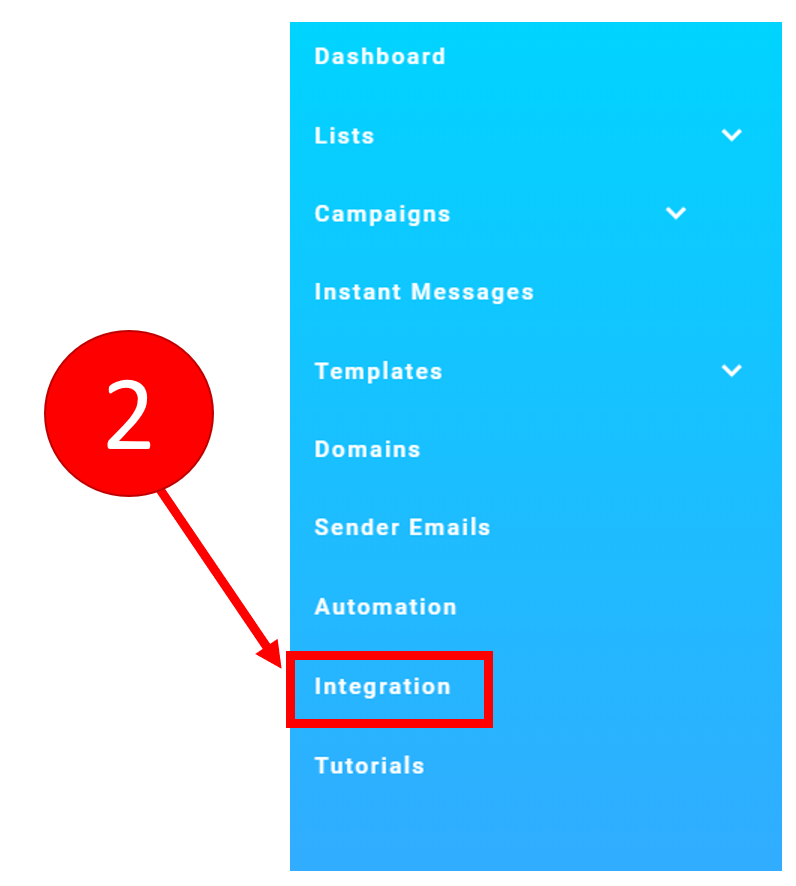
Step 2: On the popout menu, click “Integration”.
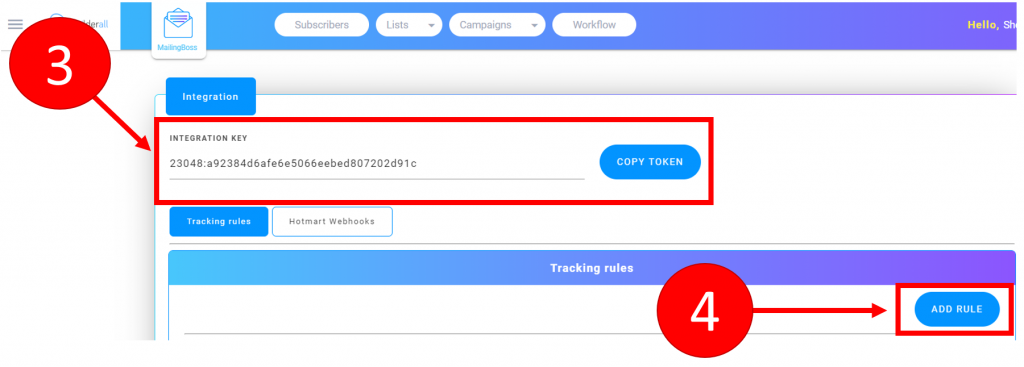
Step 3: In the integration area, find the Integration Key and click “Copy Token” and paste into Notepad (you will need it in a later step).
Step 4: Click the “ADD RULE” button
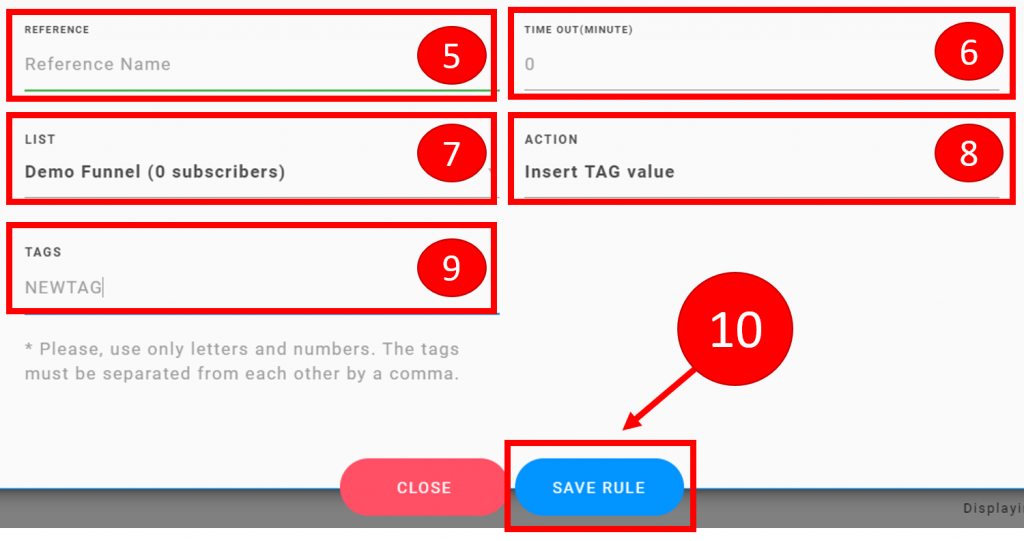
Step 5: Name your Reference and copy the name to Notepad (you will need it in a later step).
Step 6: Add the amount of time you want to wait until the tag is applied to the site visitor. If you want the tag applied immediately, leave it the default of 0. If you want the tag to be applied after 1 minute, change the number to 1.
For example: If the page you have the tag on is a video, you many want to tag them after 5 minutes to verify that they were on the page for at least 5 minutes watching your video.
Step 7: Choose the Mailing Boss Subscriber List that this rule will apply to.
Step 8: Click the down arrow and choose “Insert TAG value”
Step 9: Add the name of the new tag that will be applied to the visitor.
Important: When creating a tag, use ONLY letters and numbers. DO NOT use spaces or symbols. If you want to apply more than one tag, be sure to separate them by a comma.
Step 10: Click “SAVE RULE”
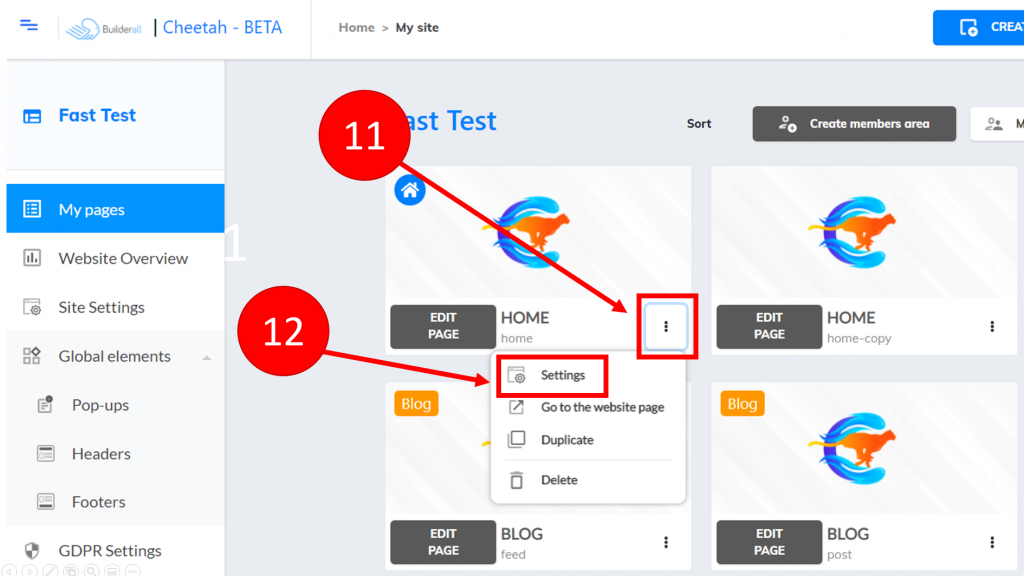
Step 11: Go to Cheetah and access the website where you want to add the Mailing Boss integration. Go to the “My Pages” area of your website. Find the page that you want to add the tag to that indicates a visitor accessed that page. Click the triple dots on the page card in the page list.
Step 12: Click “Settings”
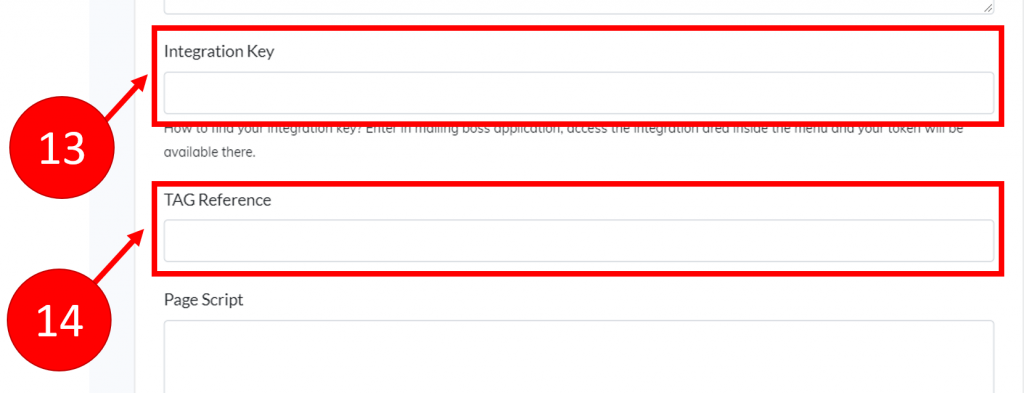
In the page settings popup, scroll down until you see the Integration Key and Tag Reference fields.
Step 13: From your notepad, copy the Integration Key (step 3) into the Integration Key field
Step 14: From your notepad, copy the TAG Reference (step 5) into the TAG Reference field.
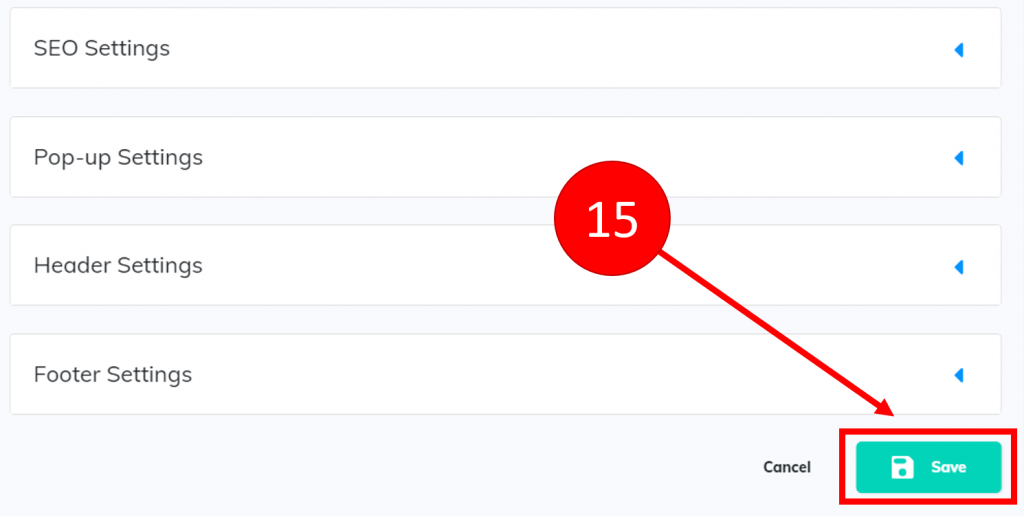
Continue scrolling down the page settings popup until you get to the bottom.
Step 15: Click “Save”
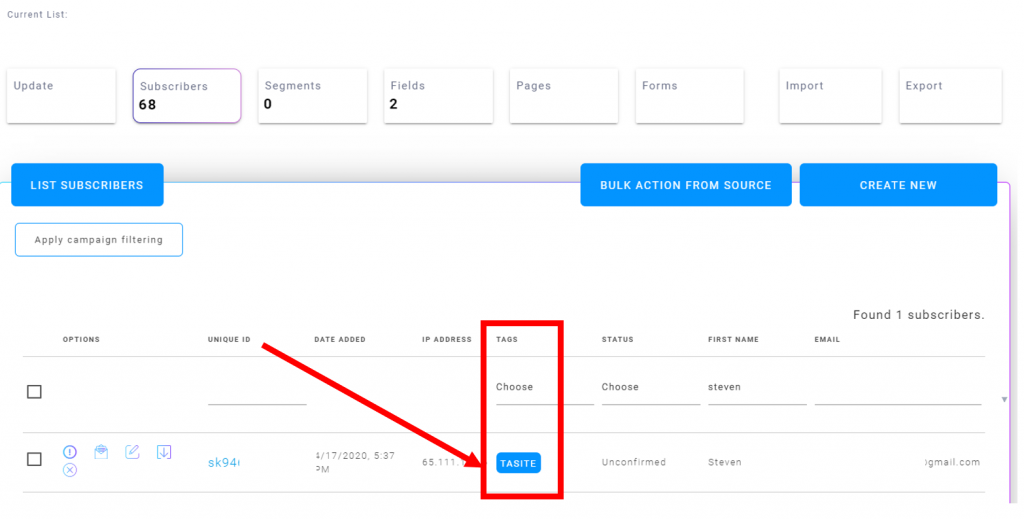
When a new subscriber is added to Mailing Boss and they visit the page with the tag for the indicated amount of time, the subscriber will get a new tag that shows in Mailing Boss.
This tag can be used to SEND special email sequences that those without the tag will not get. You can also choose to NOT SEND an email sequence if they have the tag.