In this tutorial you will learn how to configure Multi-Level student access in your eLearning Course for certain lessons.
- CREATE ELEARNING
Step 1:
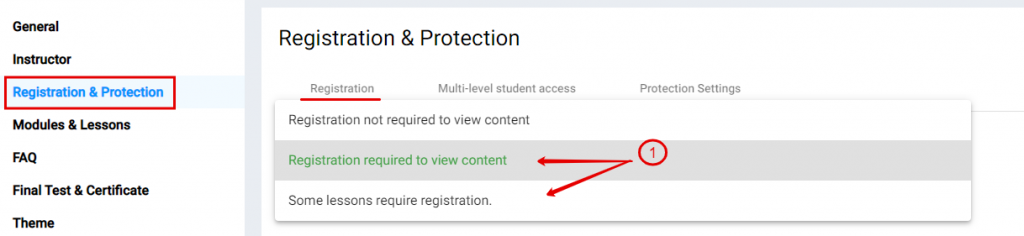
- Scroll to “Registration & Protection”
- Choose either “Registration required to view content or “Some lessons require registration”
Step 2:
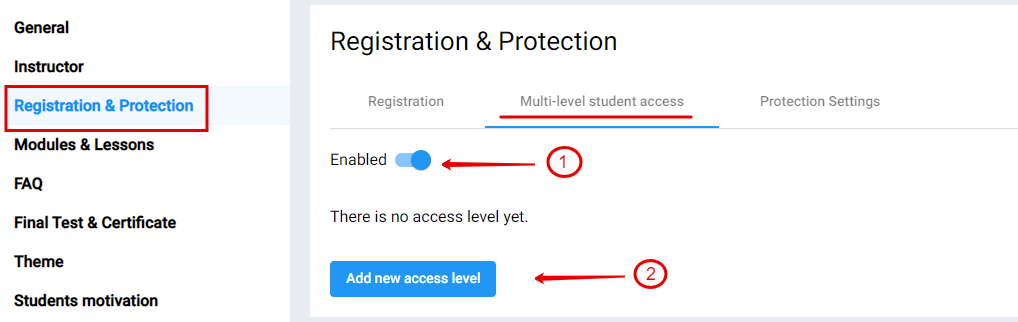
- Choose Multi-level student access
- Click “Enabled”
- Click “Add new access level”
Step 3:

- Payment with Super Checkout
- Add a name for Access Level
- Add a description for Access Level
- Get Super Checkout link (see Step 5)
- Enable if you want to give this level to new registered students
- Click on “Create”
Step 4:

- Click on “Save”
Step 5:
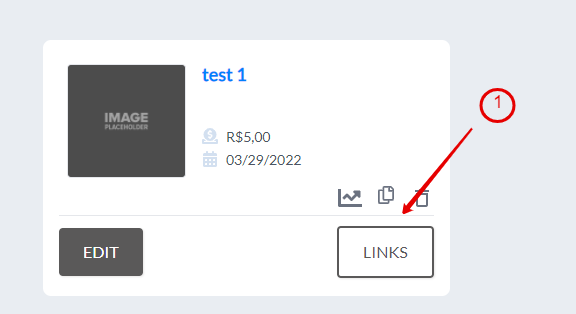
See Step 3: (Super Checkout)
- Go to Supercheckout Product and click on “Links”
Step 6:
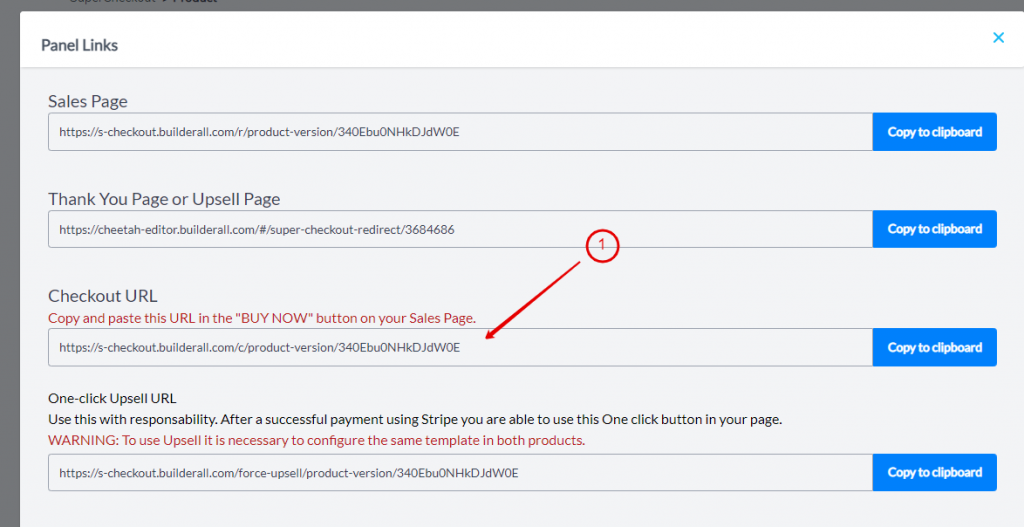
See Step 3: (Super Checkout)
- Copy the “Checkout URL” and paste it in Step 3
Step 7:

- Go to Modules and Lessons
- Go to the lesson you want to enable for multi-level access and click on the pencil to edit
Step 8:
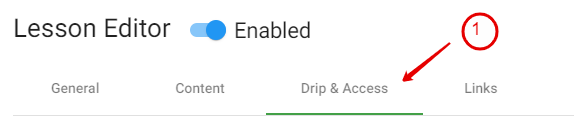
- Go to “Drip & Access”
Step 9:
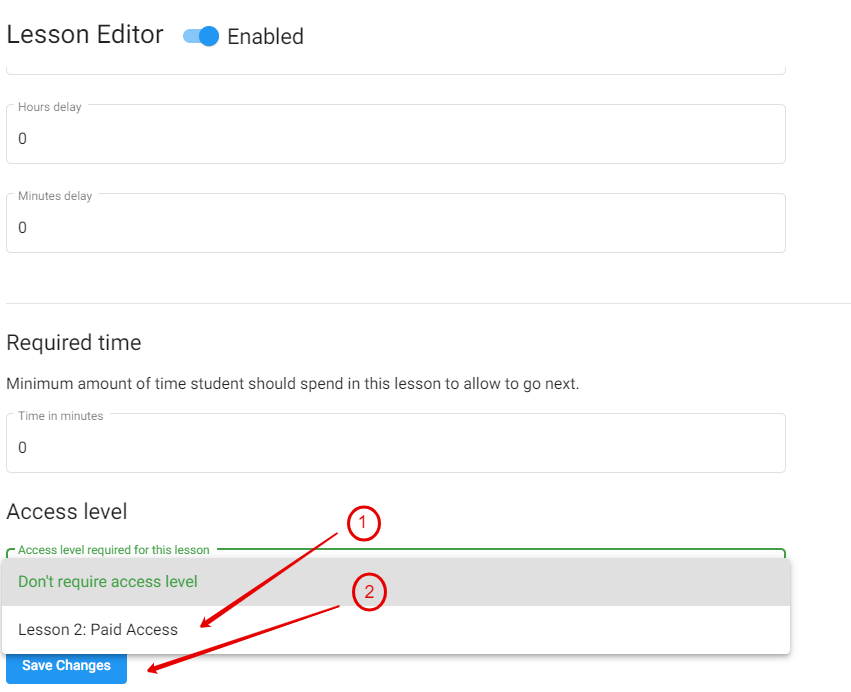
- Scroll to Access Level
- Choose the level required for access
- Click “Save Changes”
Step 10:

- Click “Save”