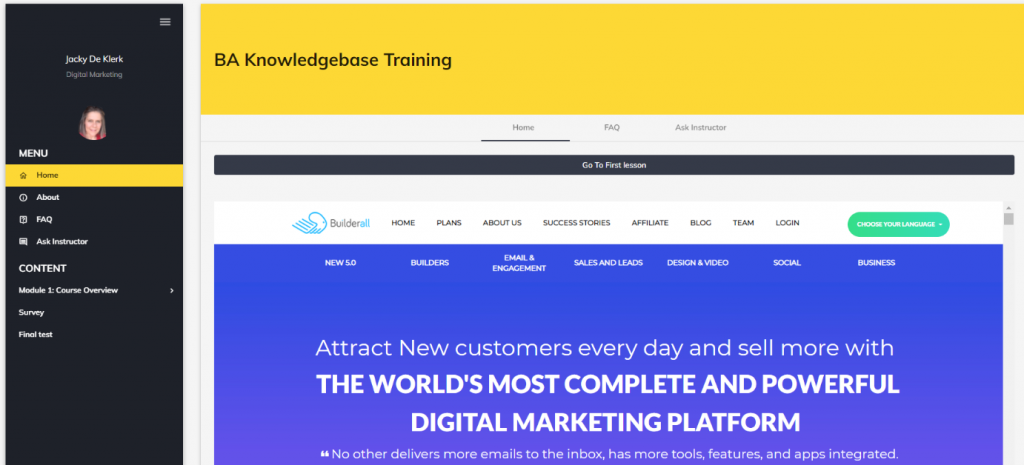
In this tutorial you will learn how to configure a Standard Theme (Custom) in eLearning
- CREATE ELEARNING
Step 1:
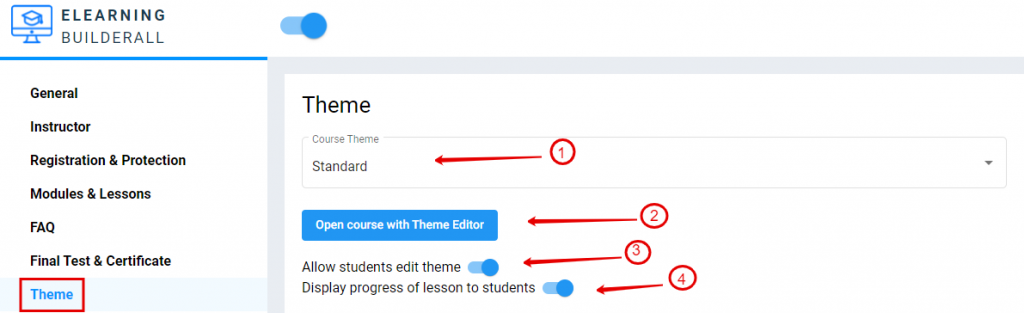
- Scroll to “Theme”
- Choose “Standard” in the dropdown options
- Click on ” Open course with Theme Editor” if you want to customize the course (See Step 2)
- If you want students to personalize the theme to themselves you can enable it here
- If you want the students to see their progress of the course, enable it here
Step 2:
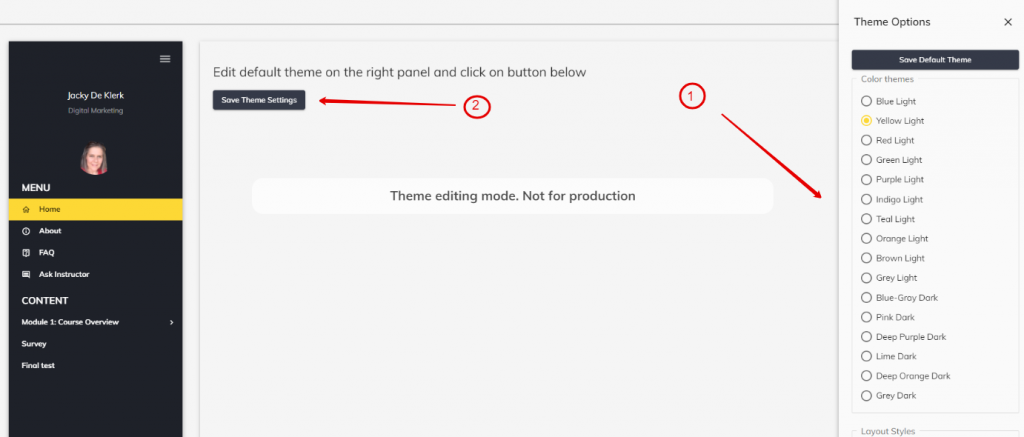
- On the left you will have a variety of ” Theme Options” to change the way the eLearning look
- When you are done changing the “Theme Options” click on “Save Theme Settings”
Step 3:

- Here you can decide what you want to show in the main page. In the next few steps we will look at each one of them.
- Standard Option: (See example in Step 4)
Step 4:
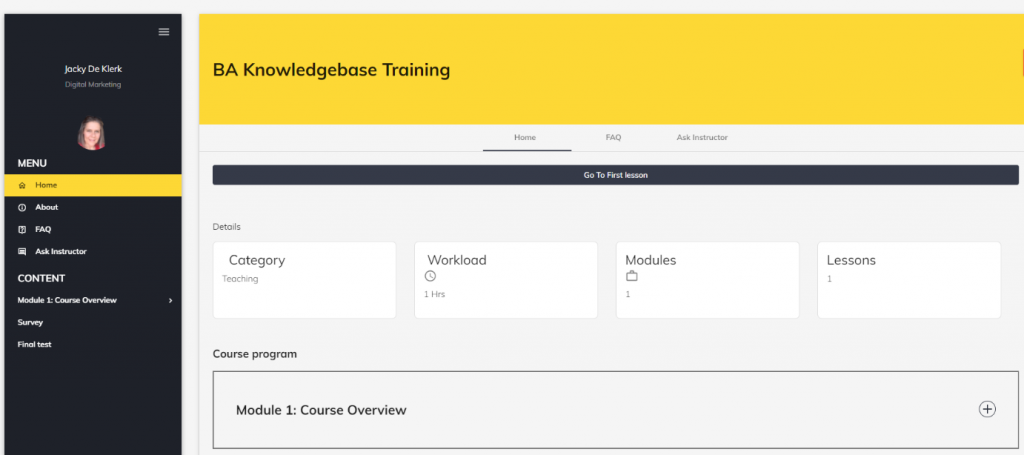
- Standard Option
Step 5:
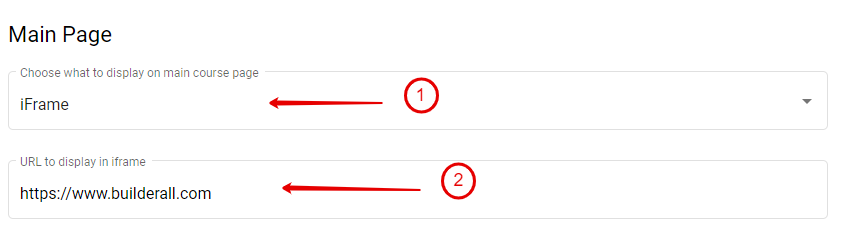
- iFrame Option: (See example in Step 6)
- Add the URL that you like to be displayed.
Step 6:
- iFrame Option
Step 7:
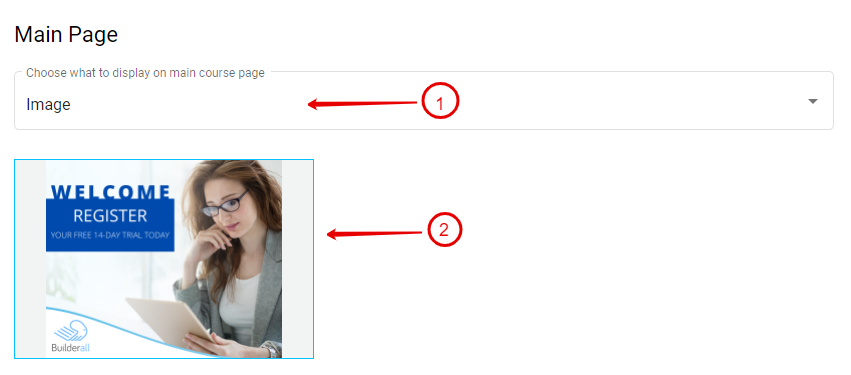
- Image Option: (See example in Step 8)
- Upload the Image you want to use
Step 8:
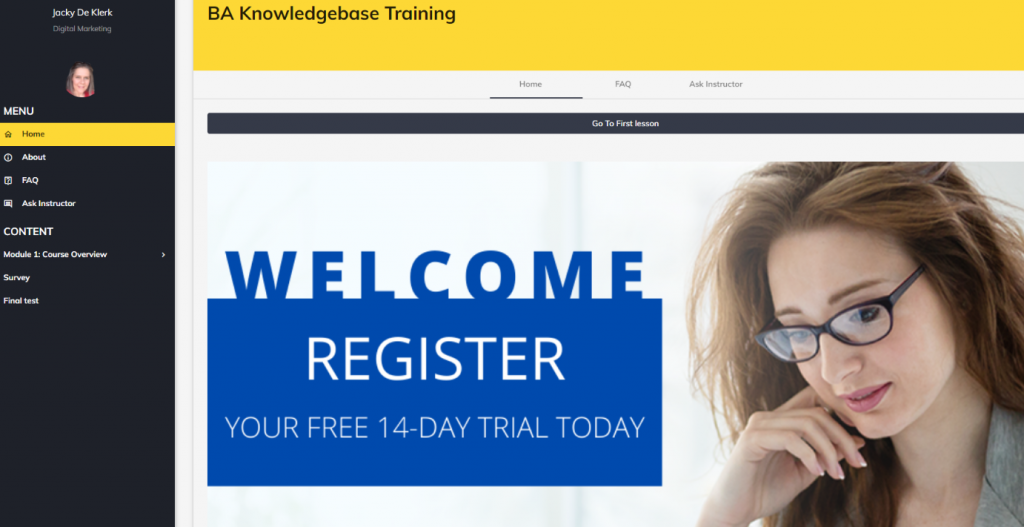
- Image Option
Step 9:
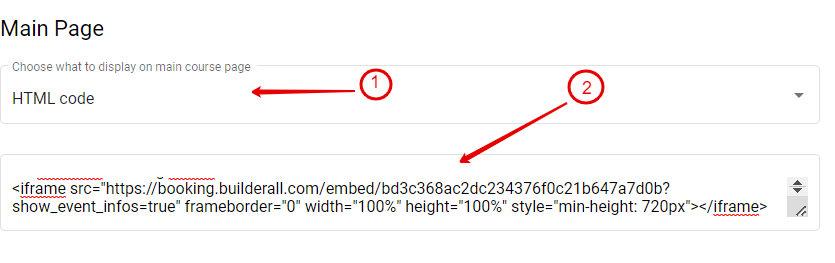
- HTML Option: (See example in Step 10)
- Copy and paste the embed code from the other application here. This example we use the Booking App
Step 10:
- HTML Option
Step 11:
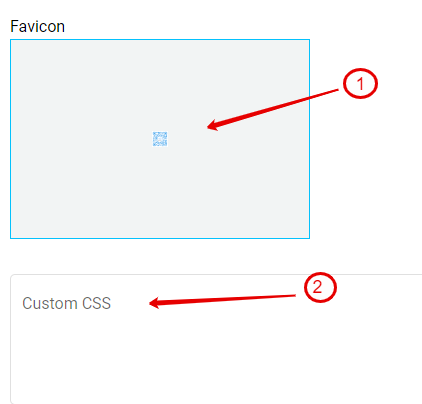
- Add your eLearning “Favicon” here
- 16 x 16px or 32 x 32px works best
- You can also add your own CSS code here
Step 12:

- When all done, click on “Save”