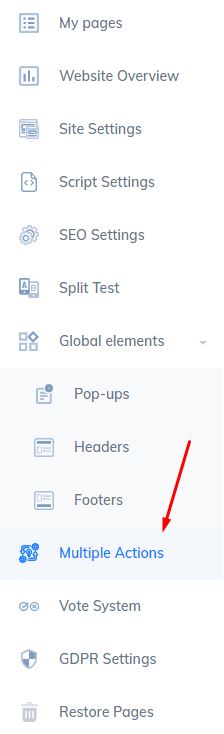
To set up a multiple action, you can no longer do it from the button. You will have to go to the “Multiple Actions” option in the side menu of your website.
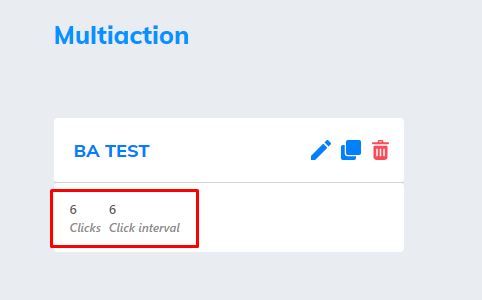
In this configuration you will be able to check how many clicks the button has received and what interval it is in. For example, if you have configured the first action with 4 clicks and the second action with 3 clicks and the interval is marking the number 10, that means it is in the first interval, because 4+3 (add up 7 the actions configured on the buttons) plus 3 clicks to add up to 10, then it means it is in interval 3 of the first button.
The big difference here is that you will be able to configure the same multiple action on multiple buttons. It will no longer be necessary to do the configuration button by button.
Let’s see how we can set it up.
- Open your website with Cheeath Builder. In the side menu, click “Multiple Actions”;
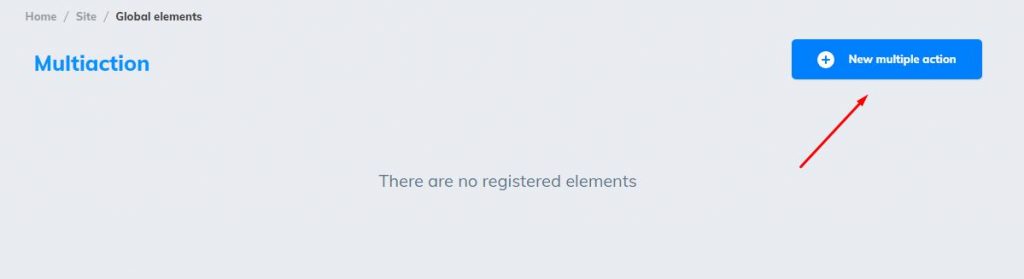
2. This page will open. Click on “New Multi-Action”;
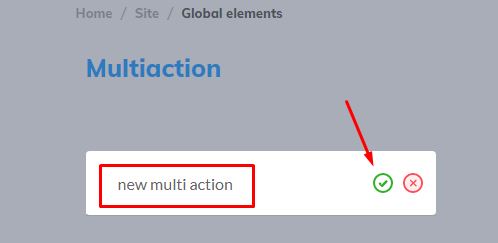
3. Enter a name for the multi-action and click this green icon;
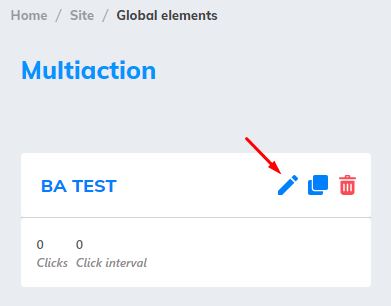
4. To configure, click on the pencil;
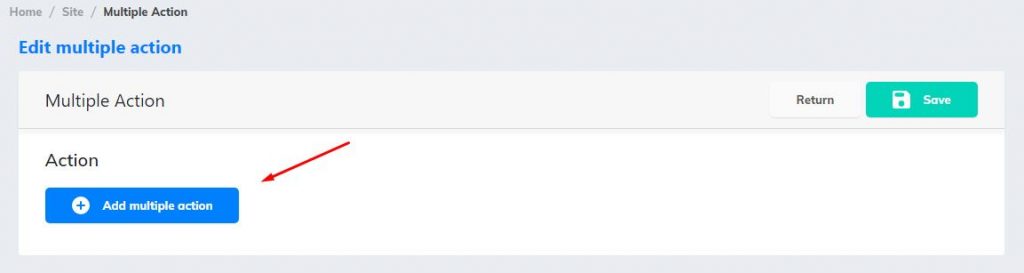
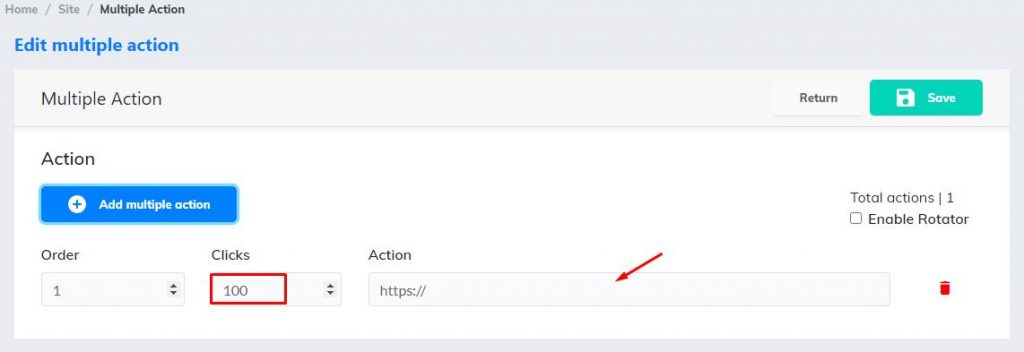
5. Click on “Add multiple action”. The first action will appear. Just set the number of clicks and insert the link into the action;
6. Like in this image below;
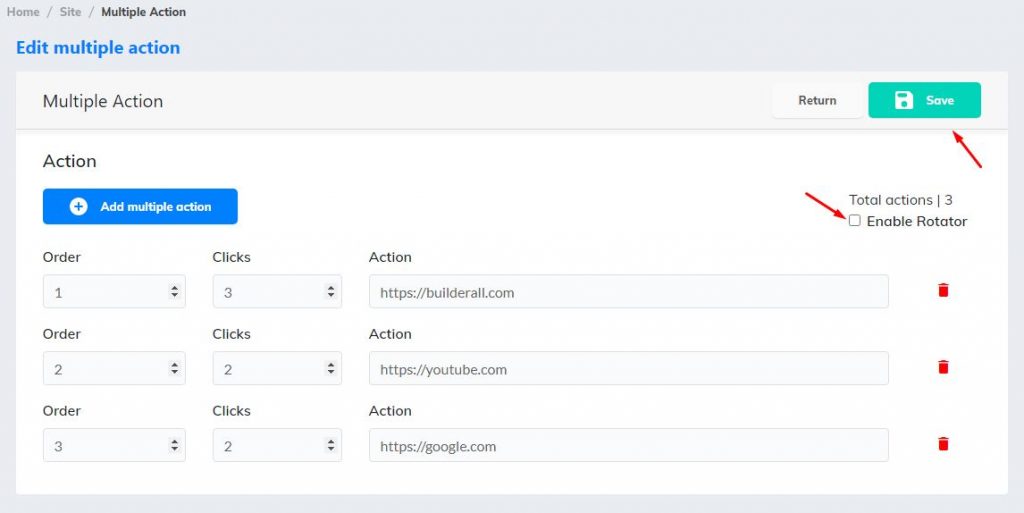
7. Enter as many actions as you think necessary. Select this square so that the links can rotate and click “Save”;
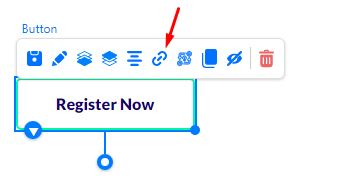
8. On your page, insert a button or use an existing one. Click the “Set link” option;
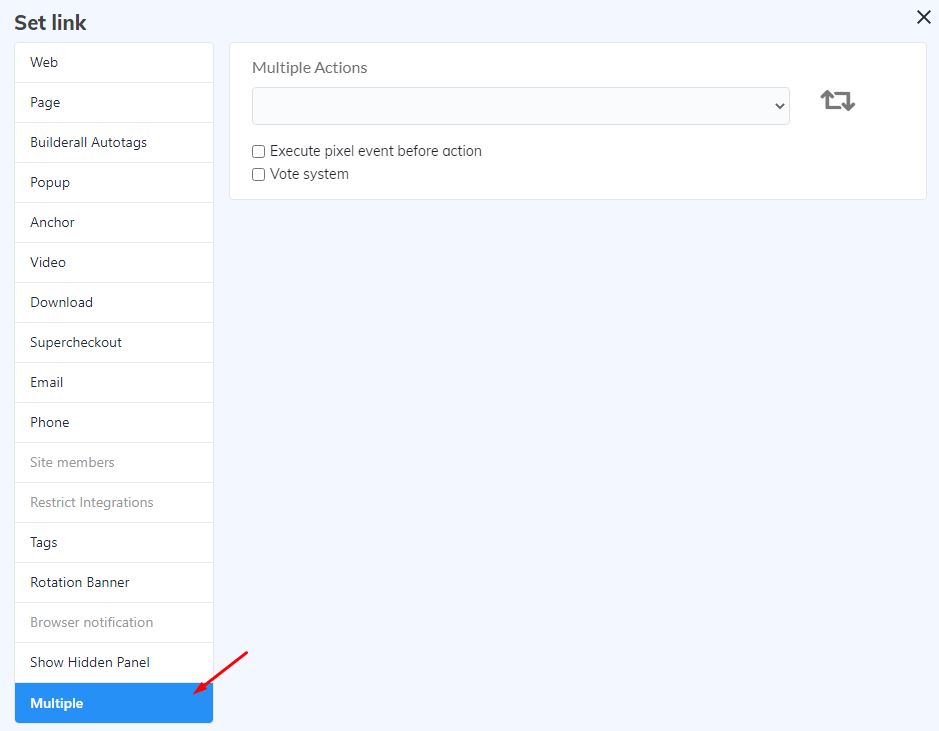
9. This page will appear. Scroll to the bottom and click on “Multiple”;
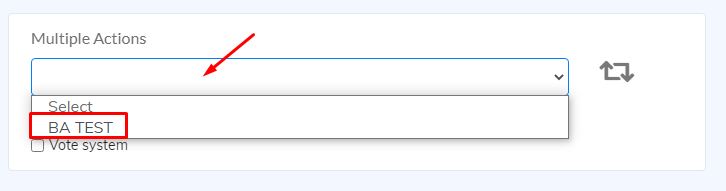
10. Here you will select the multiple action you have created. Note that you can create multiple actions and use a specific one for each button;
11. Save this setting and republish your website. Now when people click on the button, they will be redirected to the configured links. Here you can check how many clicks the button has had, and what range it is currently in;