- Open the Cheetah WP editor. On the left side menu, you will have the option to “Save template”. This option will save your page template so that you can use it in the future when creating other pages. Click the “Save template” option;

2. A window will open asking you to enter a name for the template. After entering the name, click “Save”;

3. To view the saved template, click on this plus sign (+), located at the top of the screen;

4. Click on the “Templates” option;

5. Click on “Templates”, then “Saved Templates”;
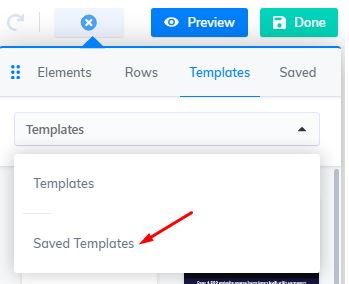
6. All your saved templates will be shown in this section. To use one of your saved templates, select the page you want to use the template for and click the desired template;

7. To save a line, click on the gear;

8. This window will appear. Click “Save As”;

9. Enter a name to identify the saved line, select whether this line is global or not by clicking on this option and press “Save”;

10. To check the saved line, click the plus sign (+);

11. Select “Rows”, and then “Columns”;
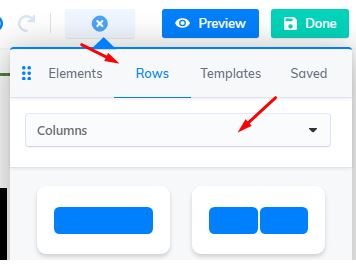
12. Now click on “Saved rows”;
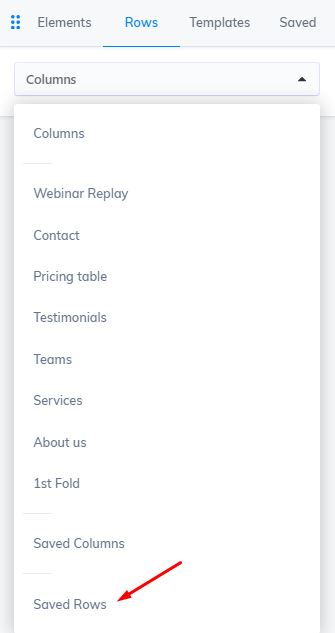
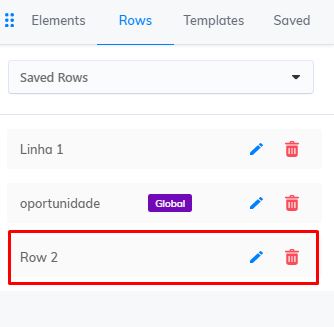
13. In this part you will see all the lines that you have saved. Notice that in this example, it was saved as a global line. To use this line, simply select the page and click on the desired saved line;
14. To save a column, click on this button;
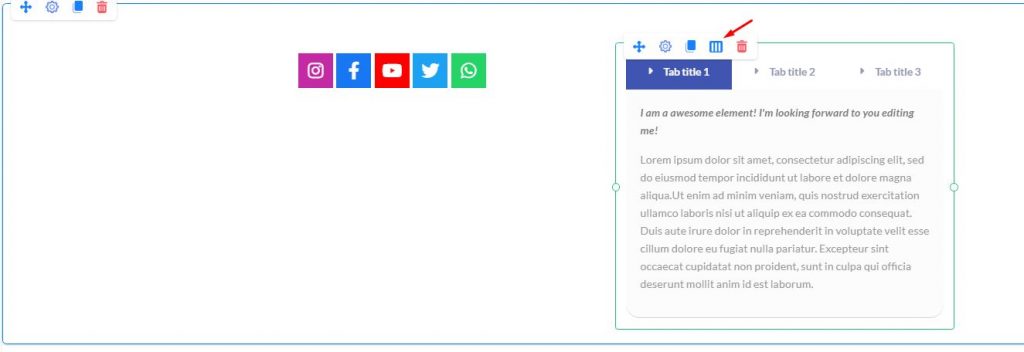
15. Click on the “Column Settings” option;

16. Click “Save As”.

17. Enter a name to save the column, define whether it will be global or not and click “Save”;

18. To check the saved column, click on the plus sign (+);

19. Go to “Saved”. In this section, you will check all the saved stuff. Check here the column saved;

20. To save an “Element”; click on the gear;

21. Notice that we are saving the “Testimonials” element. Click “Save As”;

22. Enter a name to save the element. Choose if it is going to be Global or not. Click “Save”;

23. To check the saved element, click on the plus sign (+);

24. Click on the “Saved” option. Here you will check everything you have saved, including the new element;
