Objective
Show how to integrate a contact form with a list in Mailingboss to correctly capture leads.
Target audience
Beginner to intermediate users who want to capture contacts through forms and store them in a list.
What you need to understand before starting
There is one very important point:
When you integrate a form with a list in Mailingboss, it performs only one action.
It captures the lead.
It does not send an email automatically at the same time.
If you want to send emails after capture, you will need to use:
- automations
- workflows
- or sequences
This is the most common mistake.
How the integration works
The logic is simple:
- The form collects the data
- The data is sent to the list
- The list stores the contact
For this to work correctly, the fields must match.
Step 1: Prepare your list in Mailingboss
Before configuring the form:
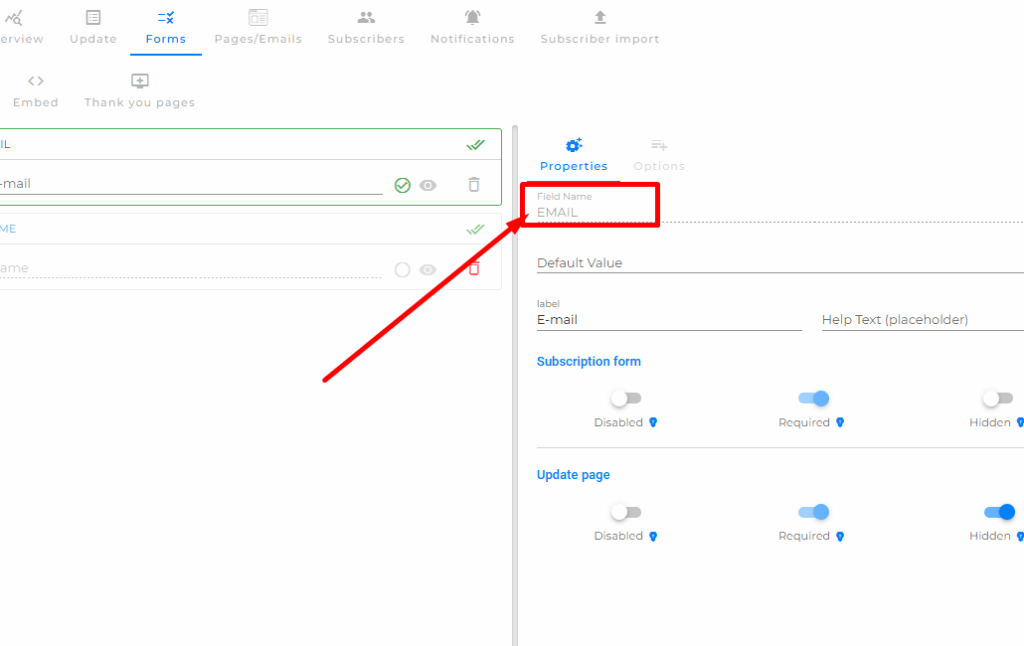
- Go to your list in Mailingboss and access the Forms section
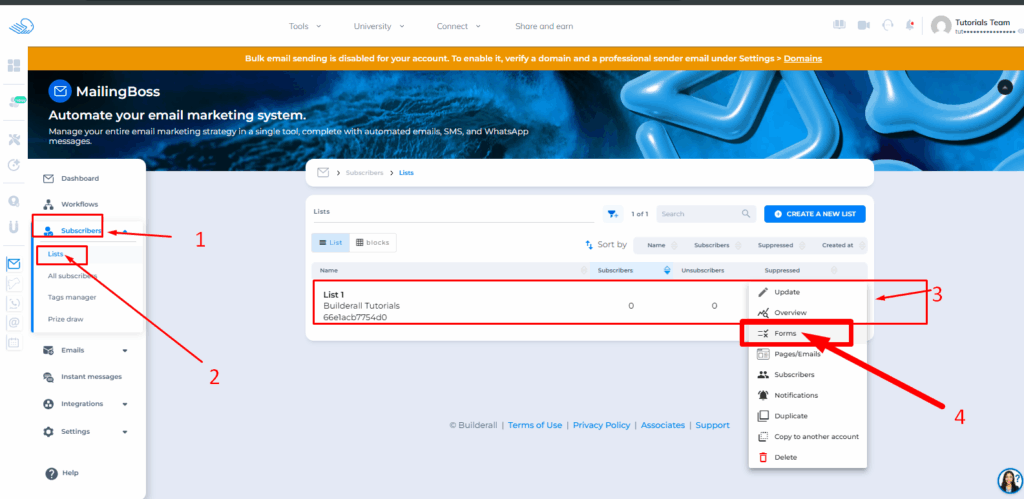
2. Go to the fields section and check which fields exist
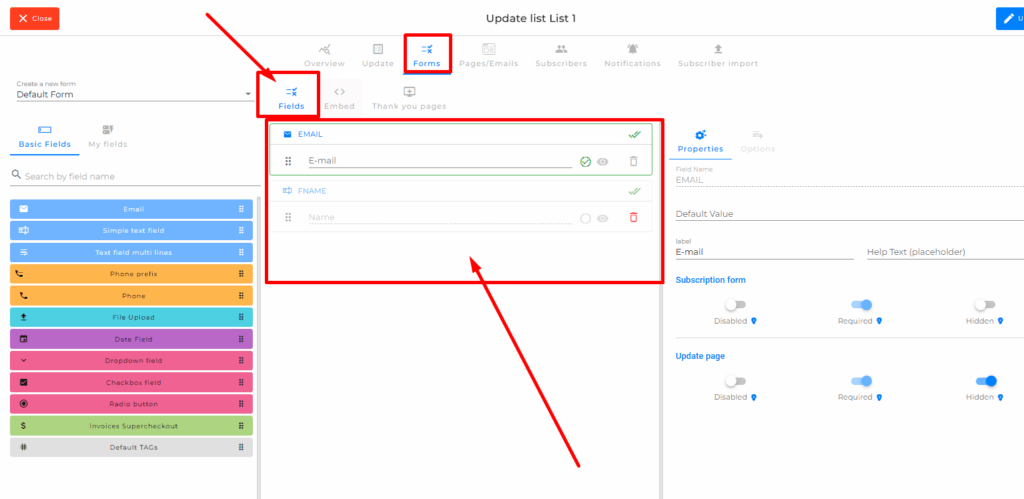
Example:
- phone
- name
- custom fields
If you created custom fields, they must be used exactly the same way in the form.
The field name in your list is what you must use as a reference when creating fields in your form.

Step 2: Create or edit the form
Now, inside the page builder:
- Add a contact form
- Edit the form fields
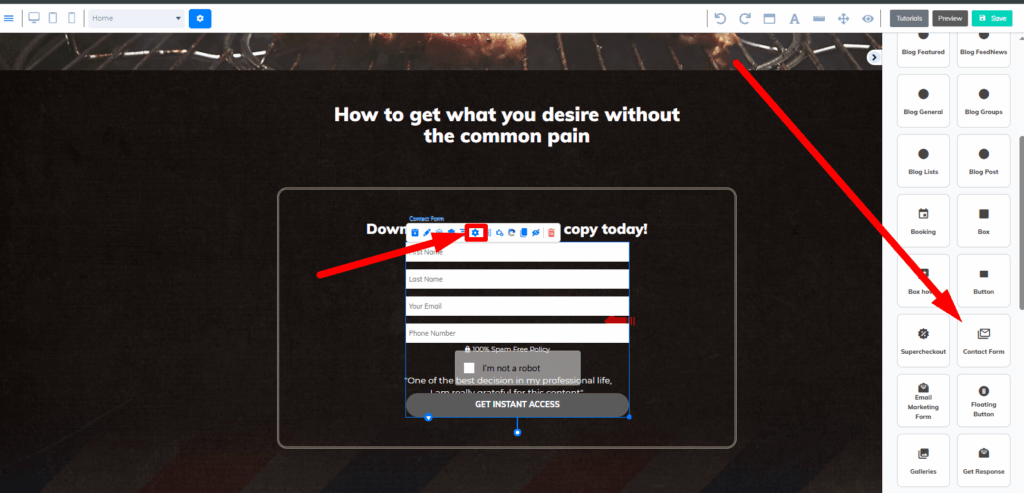
Here is the most important part:
The field TAGs must be exactly the same as in the list.
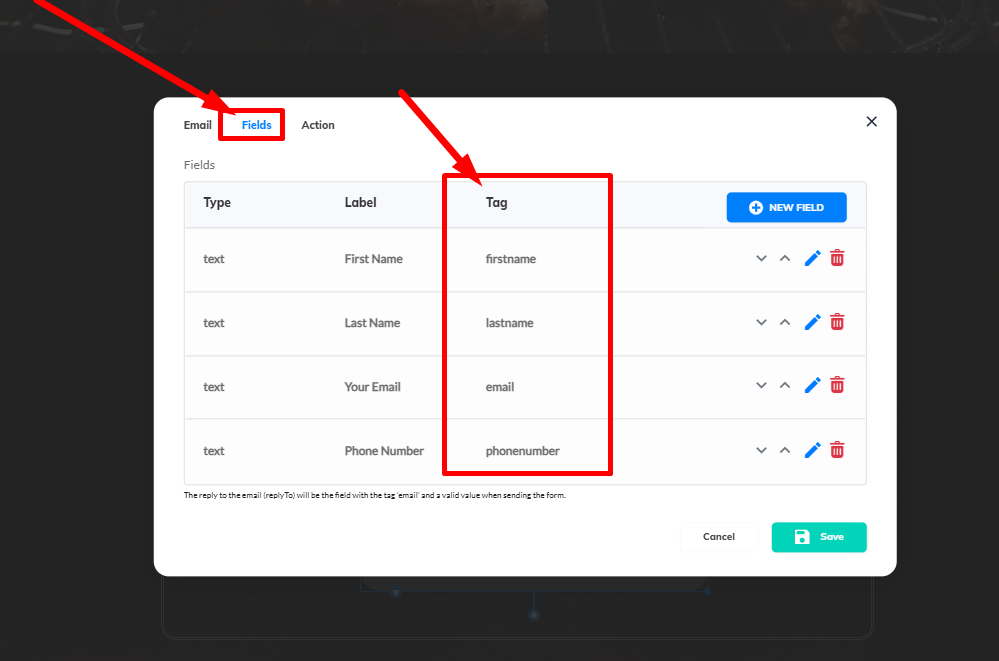
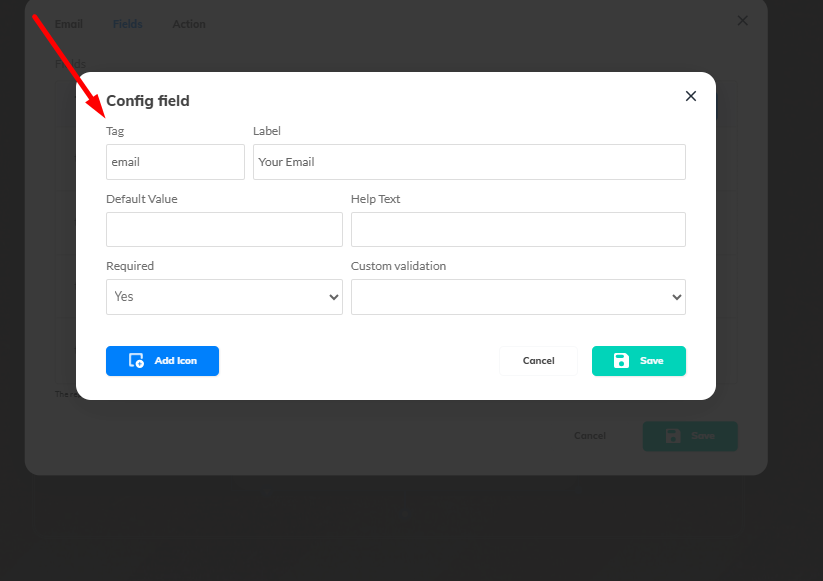
Step 3: Match the field TAGs
Each form field has an internal TAG.
This TAG must be identical to the field name in the list.
Example:
If the list field is:
- phone
In the form it must also be:
- phone
It cannot be different.
Practical examples
- email → email
- telephone → phone
- name → fname or name (depending on the list)
If they are different, the data will not be captured correctly.
Step 4: Configure the form action
Now you will connect the form to the list.
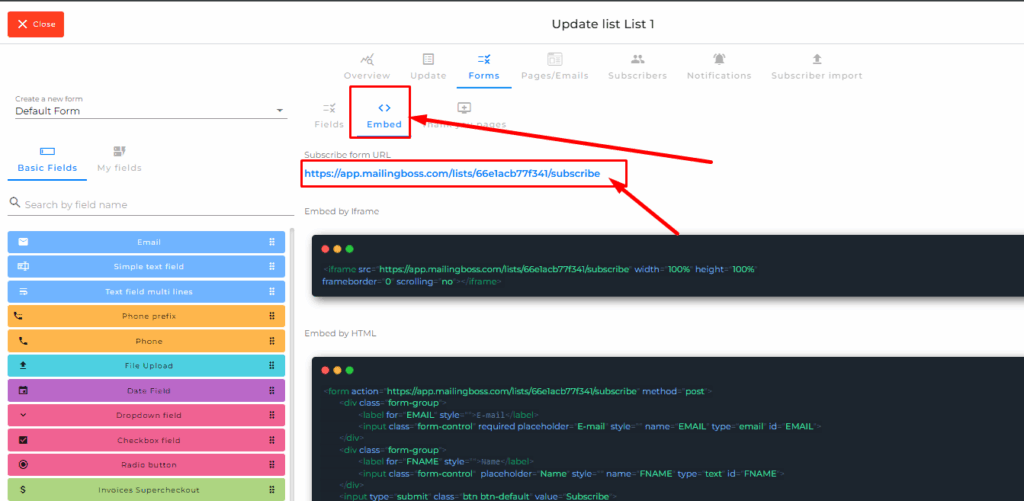
- Go to your list in Mailingboss
- Click on Embed
- Copy the subscription URL
Then:
- Go back to the form
- Paste this URL into the Action field
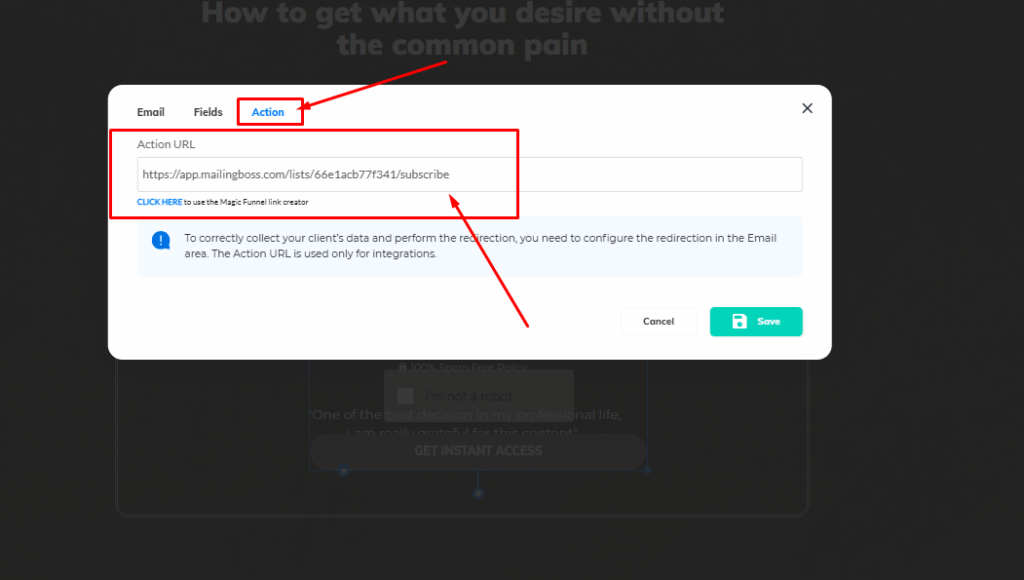
This is what makes the integration work.
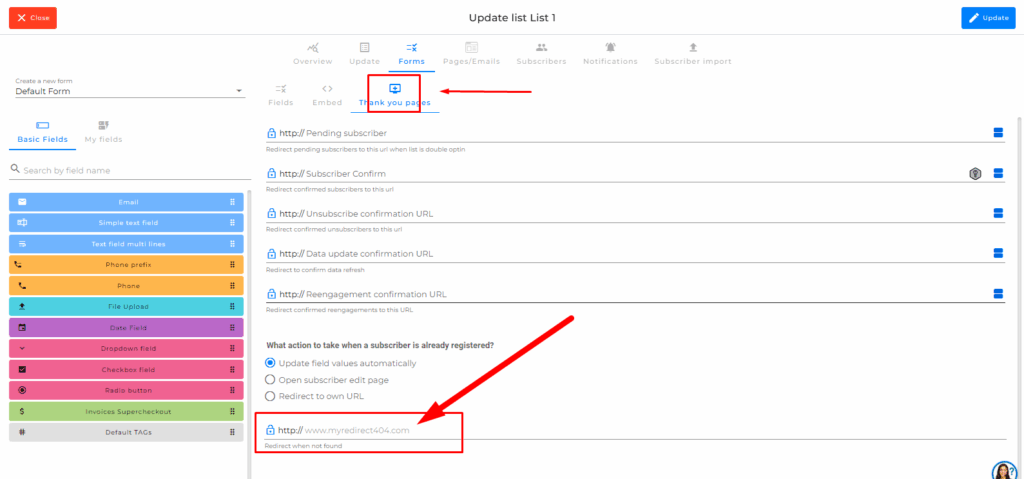
Step 5: Thank you page
Another important point:
The thank you page is not configured in the form.
It must be configured inside the list.
To do this:
- Go to the list
- Open the Thank You Pages section
- Set the redirect page after submission
Step 6: About email sending
In this type of integration:
The form does not send emails automatically.
If you configure something in the email section of the form, it will not work for this scenario.
Email sending must be done later using:
- automations
- workflows
- sequences
Step 7: Required captcha
The form must have an active captcha.
This field cannot be removed.
What you can do:
- Use the default captcha
- Or replace it with Google reCAPTCHA
But it must exist.
Without it, the form will not work properly.
Best practices
- Always make sure field TAGs match
- Test with a real email
- Confirm the contact is added to the list
- Keep field names standardized
- Avoid changing TAGs unnecessarily
FAQ
Does the form send emails automatically?
No. It only captures the lead.
Why is the lead not being saved?
Most likely the field TAGs do not match the list.
Can I customize the thank you page?
Yes, but it must be done inside the list, not in the form.
Can I remove the captcha?
No. It is required.
Troubleshooting
Lead does not appear in the list
- Check if the subscription URL is correct
- Confirm the Action field is filled
- Make sure TAGs match
Fields are not being filled correctly
- Confirm TAG names are identical
- Avoid variations like “telephone” and “phone”
Form is not working
- Check if captcha is active
- Confirm the form was saved
- Test with real data
Conclusion
Integrating a form with a list in Mailingboss is simple, but requires precision.
If TAGs match and the subscription URL is correctly configured, the capture will work.
After that, you can use automations to continue the relationship with the lead.