We will demonstrate how you can set up your checkout, changing the color and editing text and sizes. Many users confuse this configuration with form fields configuration. Shall we go?
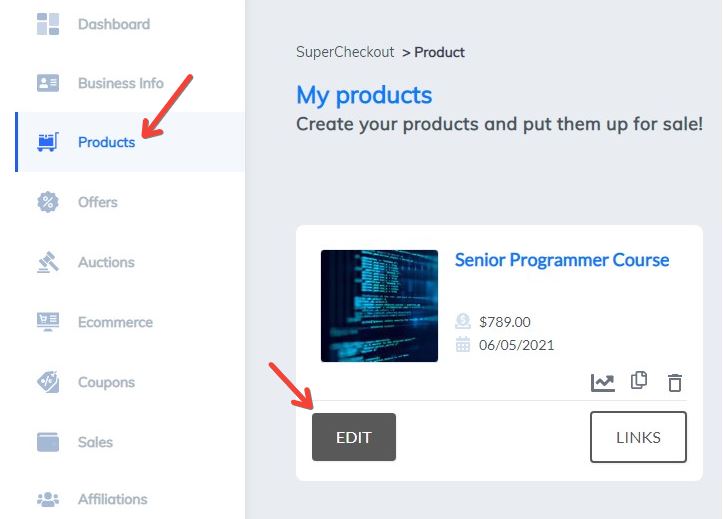
- In the Supercheckout, under “Products”, click on “Edit” the product;
2. Go to “Design”;

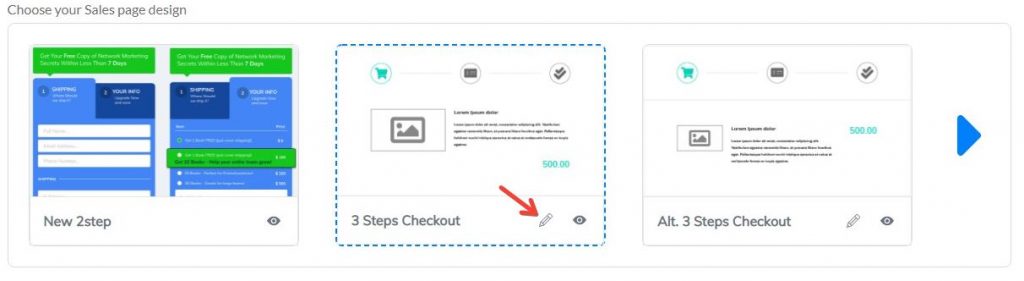
3. Choose the checkout type and click the “pencil” to set it up;
4. This page will appear with the fields to be configured;
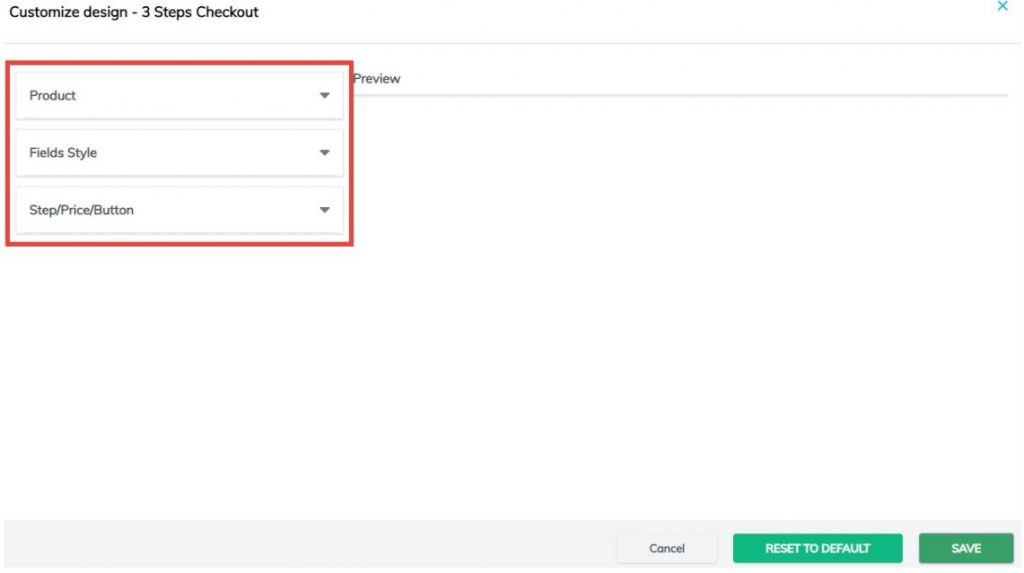
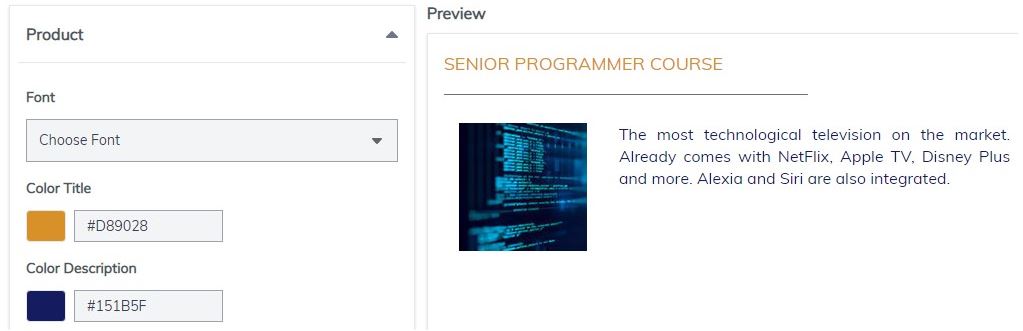
5. Field “Product” ;
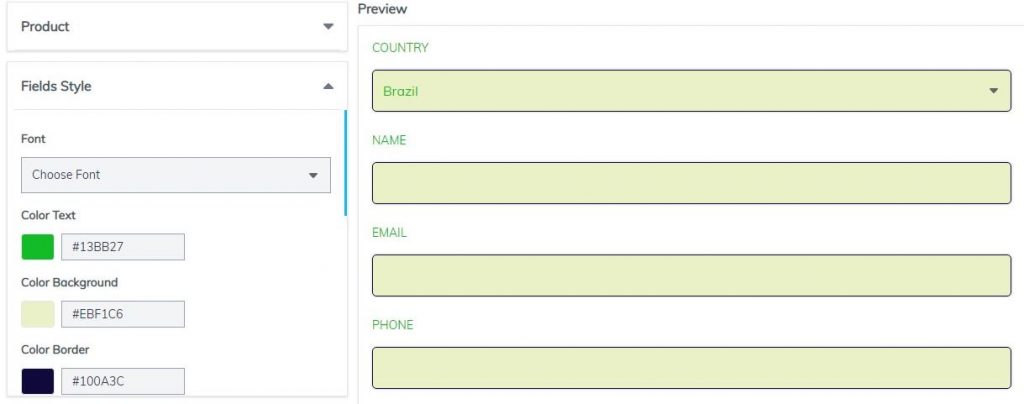
6. Field “Field Style”;
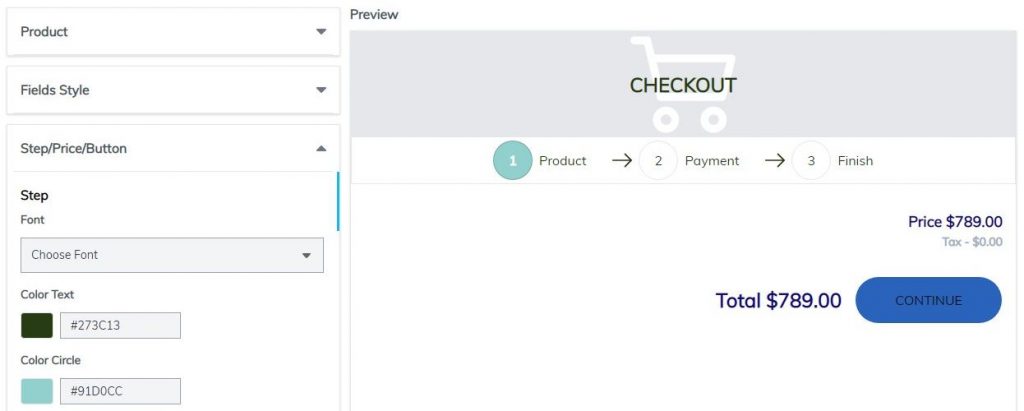
7. Field “Steps/Price/Button”;
8. After setting it to your liking, click “Save”;

9. This will be the checkout layout after it is set up;

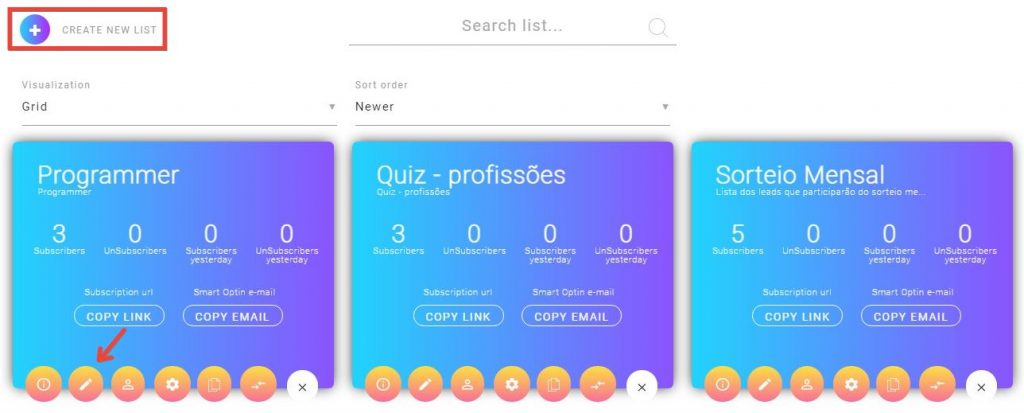
10. To insert form fields to your checkout, we will have to configure the fields in a list, in Mailing Boss. To do this, go to Mailing Boss. Choose a list and click “Update”. If you want, you can create a new list;
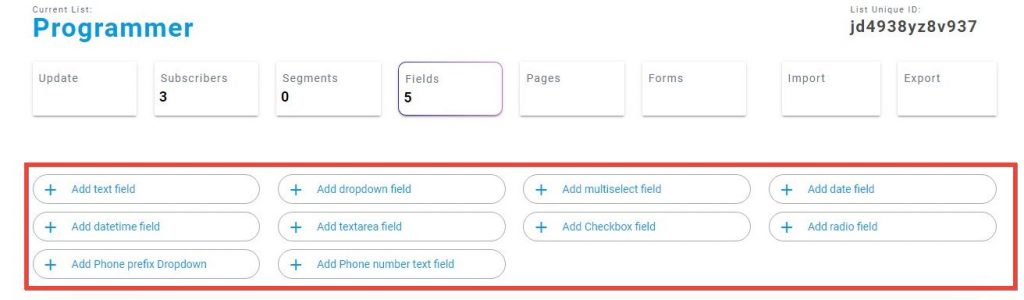
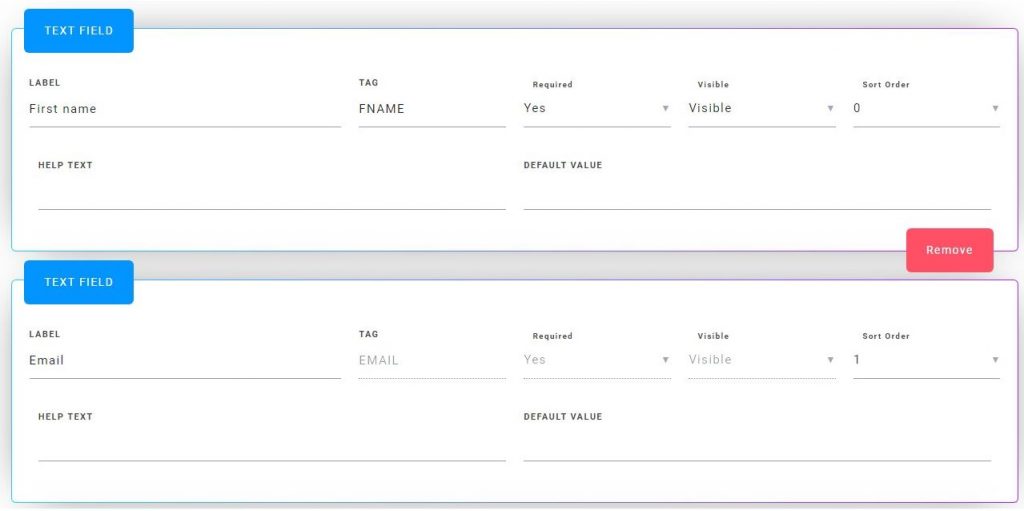
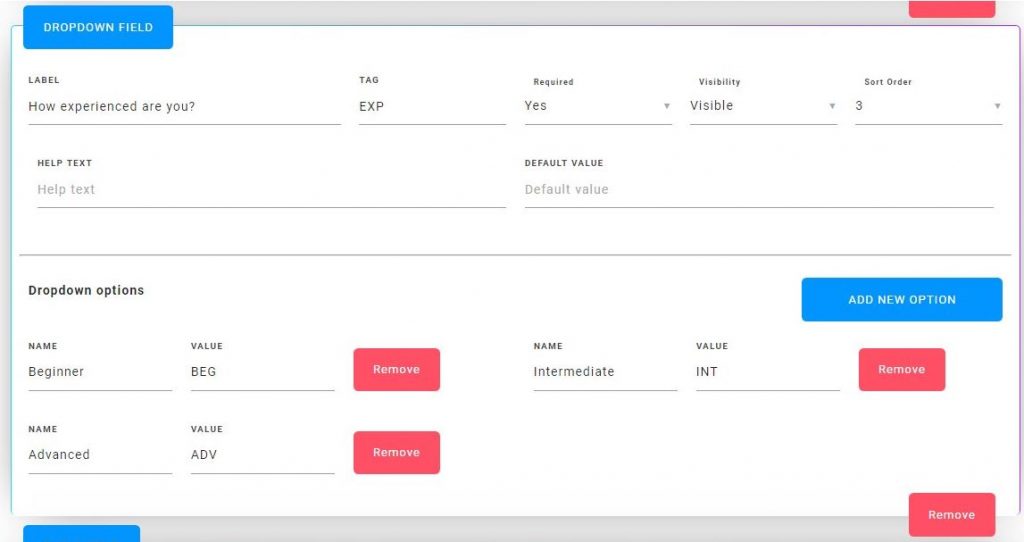
11. This page will open, click on “Fields”;

12. Several field options will be shown and you can use them in your list;
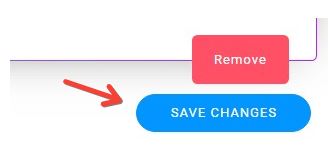
13. Assemble your form fields and then “Save”;

14. After the list is saved, we will go back to Supercheckout. Go to the product that you have configured the checkout layout for, and then to “E-Mail Campaign”;

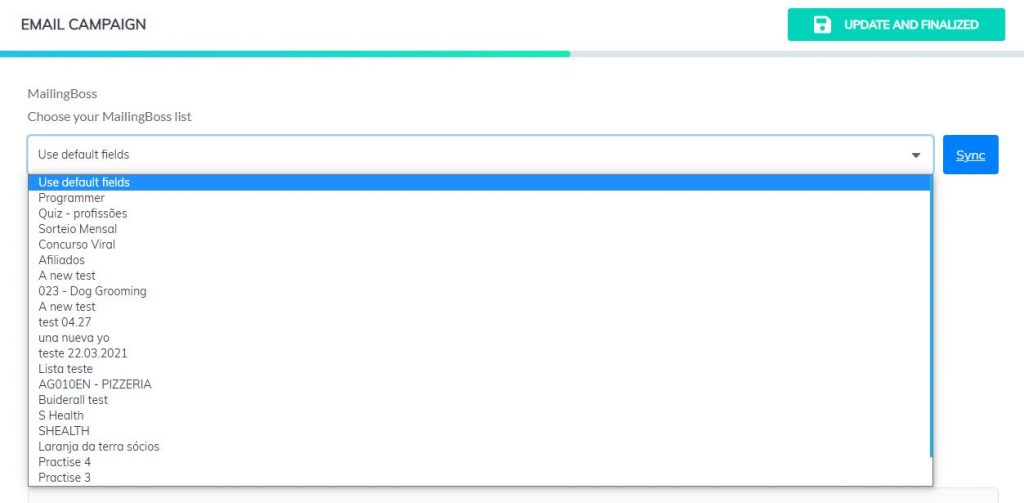
15. This page will be shown. Click here to choose a list;

16. Choose the list you configured in Mailing Boss;
17. Update and Finish this configuration;

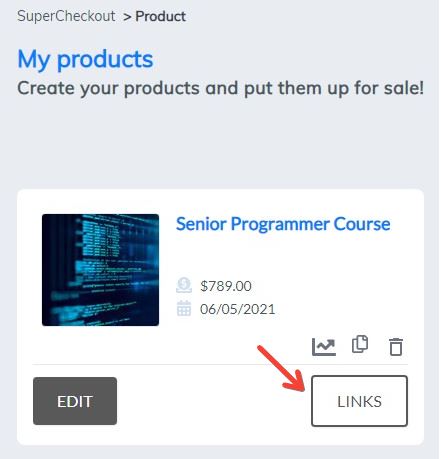
18. Go to “My Products” and click on “Links”;
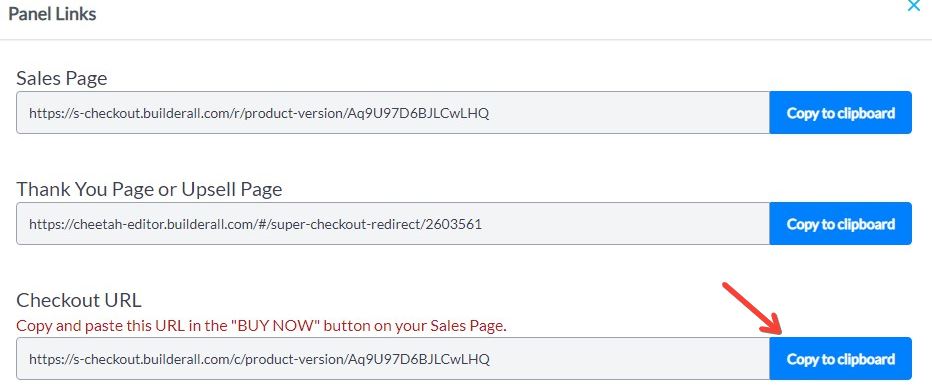
19. A “Panel Links” will appear. Copy the link “Checkout URL”;
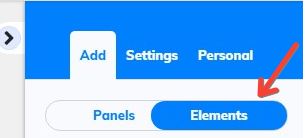
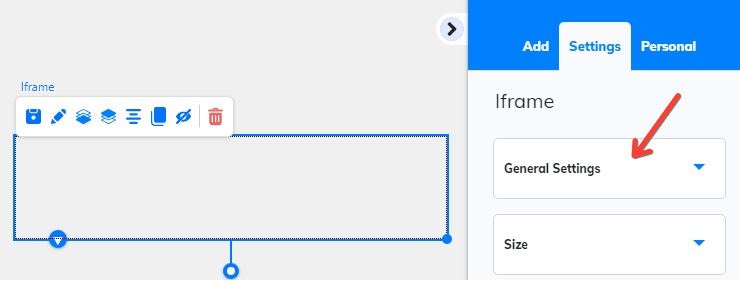
20. Go to the Cheetah Builder. Open the page where the checkout will be positioned and click “Elements”;
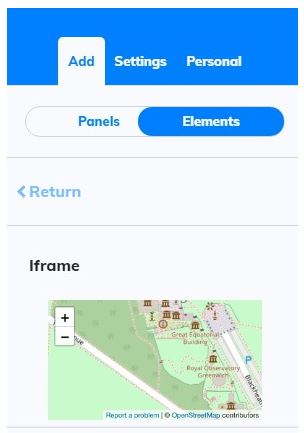
21. Go to “Iframe”. Drag and drag into your page;
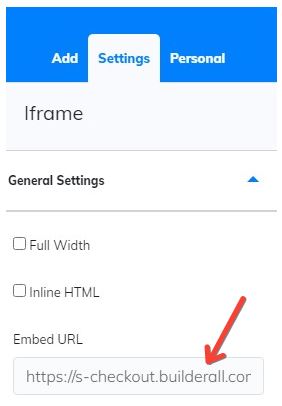
22. This “iframe” box will open. Click on it and then click on “General Settings”;
23. Paste the copied link into “Embed URL”;
24. Now just adjust the checkout on your page. When you go to step 2 of the checkout, it will look like this;
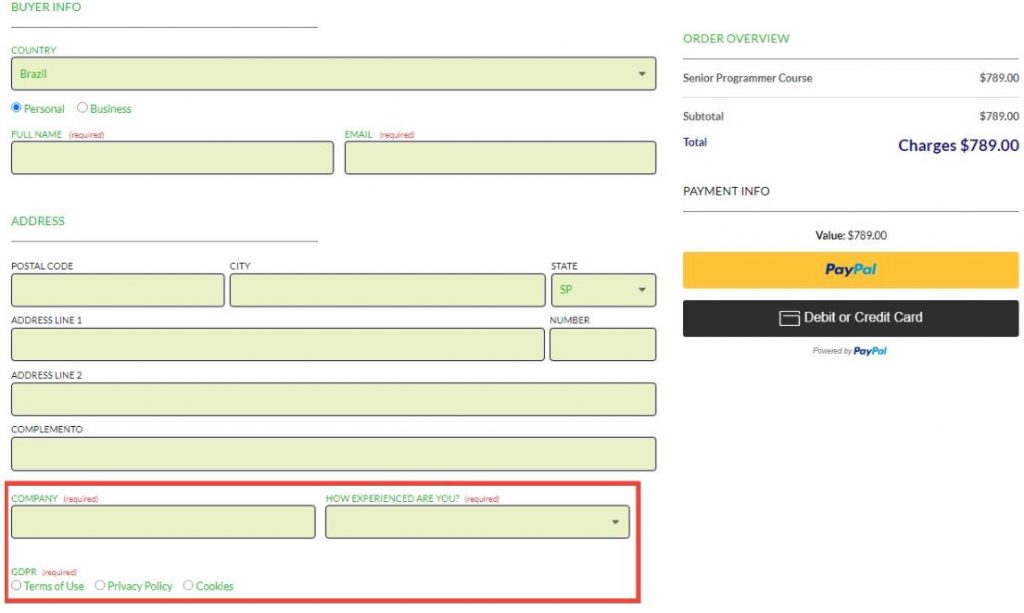
25. And this is how you will insert more form fields to your checkout.