At times, there arises a need to consolidate emails from various service providers into Gmail for more efficient business management. This post aims to guide you through the seamless process of configuring your Gmail account to seamlessly receive emails from your professional email address established within the Builderall platform.
There are two ways in receiving your professional email in another Service Provider:
- By forwarding your emails.
- By adding a few actions to your Gmail account as per this post.
Receive Emails

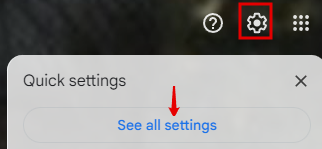
In your Gmail Account, click on the gear and choose to see all settings.

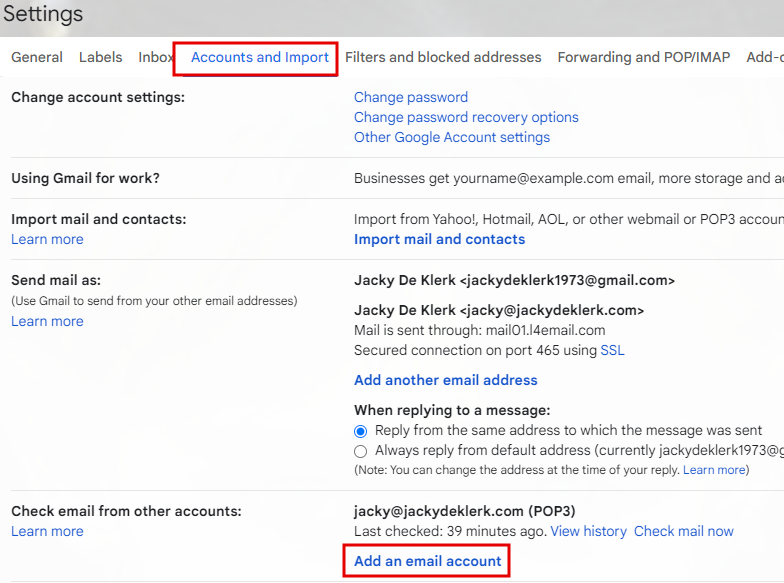
Choose Accounts and Imports and Add and email account.

Complete all the questions and make sure you add your password that you have created in the Custom Email in Builderall too. To get your POP Server address, go to the next step.

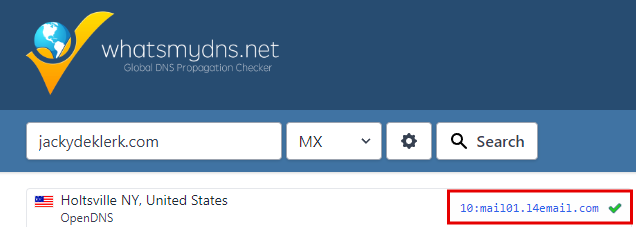
Go to the dns checker. Type in your website domain name, change the type to MX and copy the server details to the above screen.
Send Emails

To make sure you can send emails from this address, you need to “add another email address” under the “Send Email as” section.

Add the name you want your recipient to see your emails are coming from.
Also add your emails address.
Again, just as before, add your MX records again.

Ener the email and password you want to send as.
Change the port to 465 and choose secured connection via SSL
You will receive an email in your Webmail/Rainloop inbox to confirm the new “Send as email”. They will give you a code that you need to add as the last step. This must be confirmed before being able to send as.

Please rate us by giving us your feedback. It is important to us.
Let your business take off🚀