- Before you start, you’ll need the following:
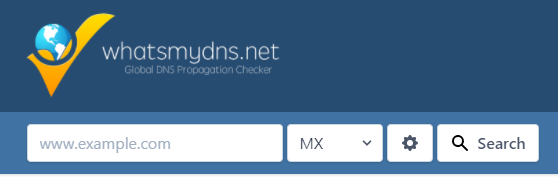
- Find the exact email server your domain uses in Builderall. To do that, you will need to go to this URL https://www.whatsmydns.net/#MX
- Type your domain in the field that shows, “www.example.com” and then click “Search”
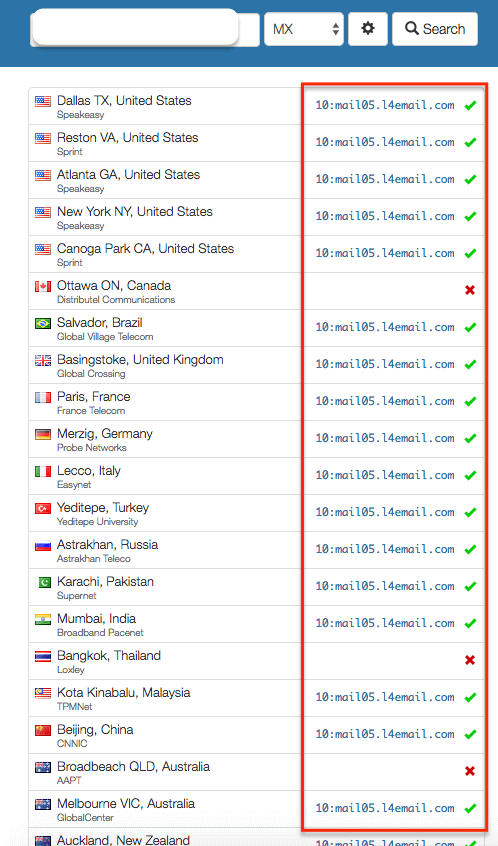
- (The XX means the number of your domain’s email server)
- In the example below, the email server is:
- mail05.l4email.com
You will also need
- Your email address: user@yourdomain.com
Your email password. - Through these instructions you will see references to “user” and “yourdomain.com” be sure to replace this with your actual username and domain name.
When you’ve copied your email information, you need to add and set it up on your smartphone or tablet. Usually, Android devices use Gmail services as the default app for emails. Now, follow the instructions below:
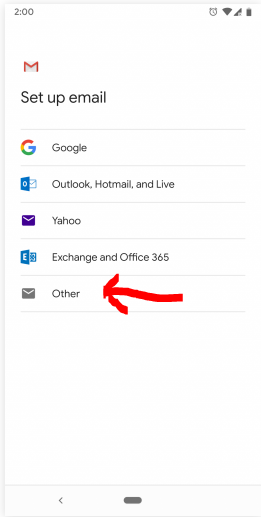
Step 1: In the top right corner of your Gmail app, click on your account. There will be a new prompt. Choose the Add another account option. On the next page, choose Other.
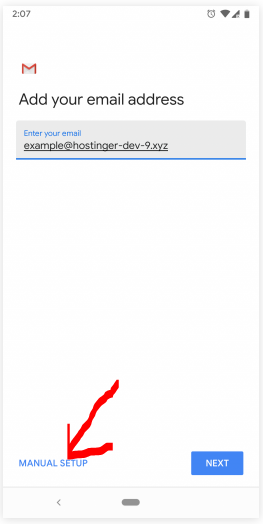
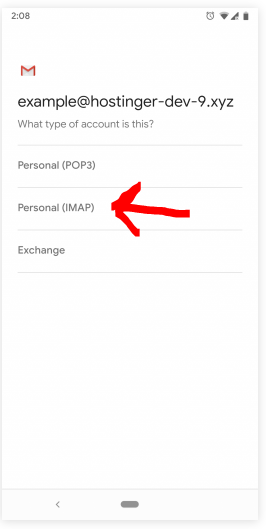
Step 2: Once you’ve entered your email, don’t hit the Next button just yet. Instead, you need to select Manual Setup.
Step 3: Choose IMAP, which has better synchronization from multiple devices. When all is done, enter your password.
Step 4: Time to configure your Incoming Server Settings.
- Ensure “Incoming” is showing at the top.
- INCOMING MAIL SERVER:
- Username: Your full username (user@yourdomain.com)
- Password: Your email user’s password
- Server: mailXX.l4email.com
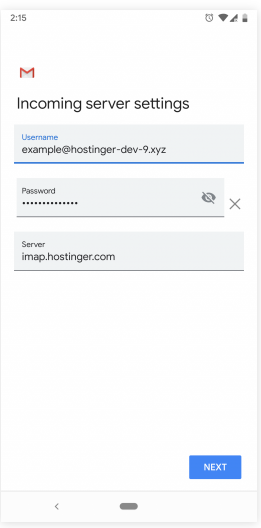
Sometimes, when you are using another hosting provider or connecting your account to a different email client, you may be asked to enter a ports number. In that case, here’s what you should use when using Hostinger services.
- IMAP Port (Secured) — 993
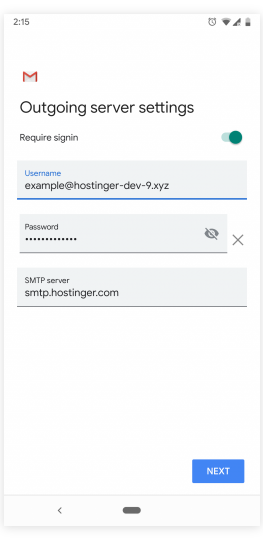
Step 5: On the Outgoing Server Settings, enter your SMTP Server.
- Ensure “Outgoing” is showing at the top.
- OUTGOING MAIL SERVER:
- Username: Your full username (user@yourdomain.com)
- Password: Your email user’s password
- Server: mailXX.l4email.com
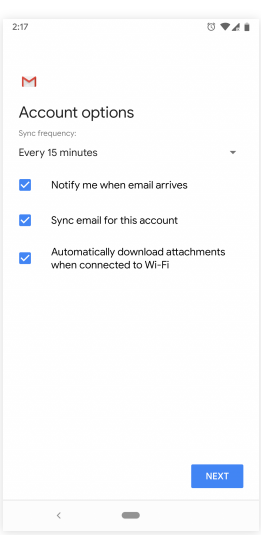
Step 6: Set your sync frequency and check any additional settings you would like to use.
- Notify me when email arrives – pops up a message on your phone each time you receive a new email.
- Sync email for this account – allows you to automatically send/receive your email for this account.
- Automatically download attachments when connected to Wi-Fi – allows you to collect attachments/files that are attached to emails when you are connected to WiFi. Checking this ensures that you do not download attachments when you are on your cellular data plan.
Step 7: Lastly, type in your account name and your personal name – or any name that you would like to use – so you could filter out messages from your personal account.
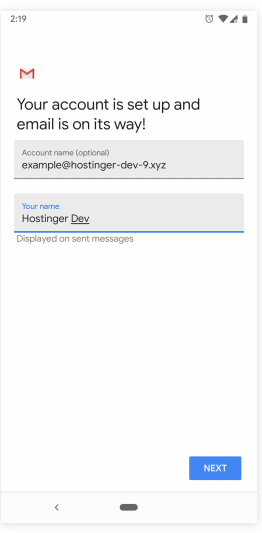
Congratulations, you can successfully send and receive with a professional email on your Android device!
Thank you for following this tour with me! If you have any questions or problems using the tool, our technical support team is always available to help you!
Please rate us by giving us your feedback. It is important to us.
Let your business take off🚀