What is SSL?
Secure Sockets Layer (SSL) refers to a protocol that provides security in client/server communications, where requests and responses are encrypted, making it difficult to intercept and manipulate data, in other words, adding the SSL certificate to your site helps protect online transactions and maintain the privacy and security of your customers’ information.
You can identify whether a website is protected by an “SSL” certificate in two ways: if you see a padlock icon next to the website’s URL in the address bar; by confirming that the acronym HTTPS (HyperText Transfer Protocol Secure) appears in the URL. Without the SSL certificate, only the letters HTTP (without the S) appear.

SSL for WordPress Pro sites:
The SSL certificate is automatically generated for sites on WordPress Pro the moment the domain is connected, taking no more than 15 minutes to be available and confirmed on the site that the domain was newly connected.
If your website continues to appear as Not Secure, without generating or propagating the SSL after the period indicated above, try clearing your browser cache or opening in an anonymous tab. If your site still does not load with SSL, follow the instructions below and learn how to quickly and easily force SSL generation on your site:
Step 1 – Log into your account at https://wordpress.builderall.com
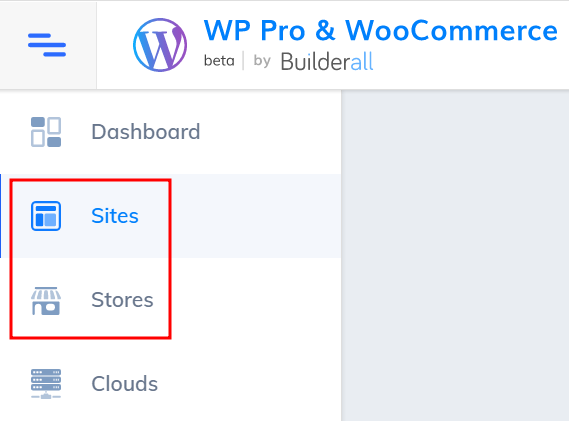
Step 2 – Access your website under the Sites or Stores tab on the left side menu.
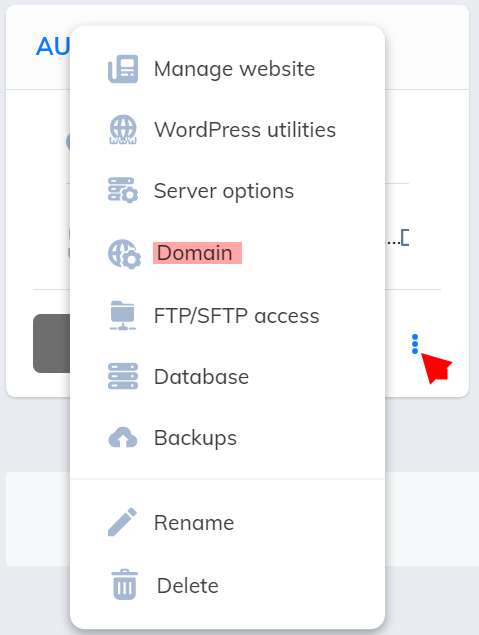
Step 3 – Locate the website with the SSL error; select the ⁝ “three dots” icon; select the “Domain” option:
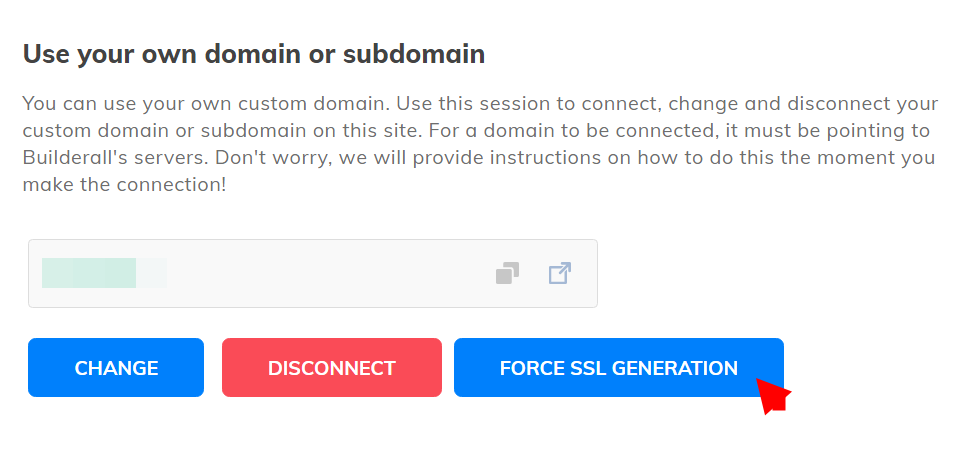
Step 4 – Select the blue button below the domain “FORCE SSL GENERATION”:
——————————————————————————————————–
Rules for using the “Force SSL” option:
– You can force SSL only after waiting the maximum time of 15 minutes indicated earlier in this tutorial after connecting the domain to the website.
– Wait 60 minutes between each request, it is, after clicking the “Force SSL” option, if SSL is disabled, wait the specified time to perform the action again.
– Do not click the SSL enable button more than once! The system used to generate the security certificate for your website allows up to 5 attempts, if it exceeds this number of attempts – clicks on the button – the SSL of your website will be blocked, if this happens, please contact our technical support.
——————————————————————————————————–
After clicking once on the button to generate the SSL, wait 5 minutes and test access to the website again.
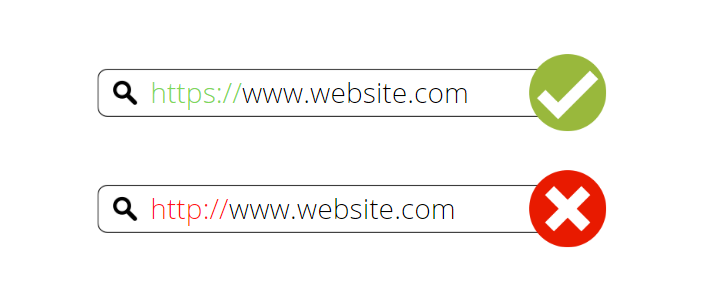
Does SSL show up as disabled? Before repeating the process above, check the URL of the website you are trying to access in your browser. If the website is accessed through http://yourwebsite.com, add the letter S to the end of HTTP to help locate the security certificate of your website that was requested to be generated, in this case the search should look like: https://yourwebsite.com
Test access again and you’re done! The website should now access normally, without indicating as “Not Secure”.
Option 1: Force redirecting your site to HTTPS:
After installing the SSL certificate with the steps indicated above, your site will be available to your customers in both HTTP and HTTPS versions; however, using HTTPS is the best option for you and your customers: it encrypts and secures your site’s data, for this reason, we advise redirecting all accesses to your site to this secure environment, this redirection can be done in two ways: via plugin or by configuring the .ht access file.
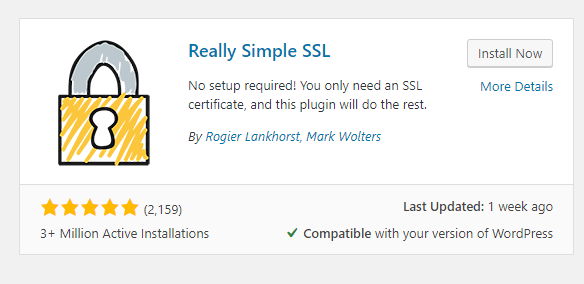
– Log into your WordPress installation and click to add a new plugin;
– Search for Really Simple SSL in the search tab; install and activate the plugin
Once completed, your website will be directed to the secure environment, regardless if the access is via HTTP.
Option 2: How to force HTTPS via .htaccess (for advanced users):
——————————————————————————————————–
– This option should only be used by advanced users who have mastered the file manager and have a preference for this setting.
– If you have installed the plugin, it is not necessary to make the settings below:
——————————————————————————————————–
- Go to your preferred File Manager and open the .htaccess file inside the public_html folder.
- Scroll down and find the RewriteEngine On line, if it exists, and insert the following code strings below it:
RewriteEngine On
RewriteCond %{HTTPS} off
RewriteRule ^(.*)$ https://%{HTTP_HOST}%{REQUEST_URI} [L,R=301]
- Save the changes.
That’s it! This ends our tutorial on how to fix the SSL generation error on our website in WordPressPro, if the error persists after following all the indicated steps, please access our technical support via chat or ticket.