Go to your WordPress admin dashboard and click “Plugins”, “Add New”, and type “Cheetah” in the keyword search field.
Verify that the version of Cheetah is compatible with your version of WordPress. If it is not, you will need to change the version of WordPress to match the requirements of the Cheetah plugin.
Click “Install” to begin installing the plugin
After the plugin installation is complete, click the blue “Activate” button.
Congratulations. You have installed Cheetah Builder for WordPress.
IF YOU PURCHASED THROUGH JVZOO
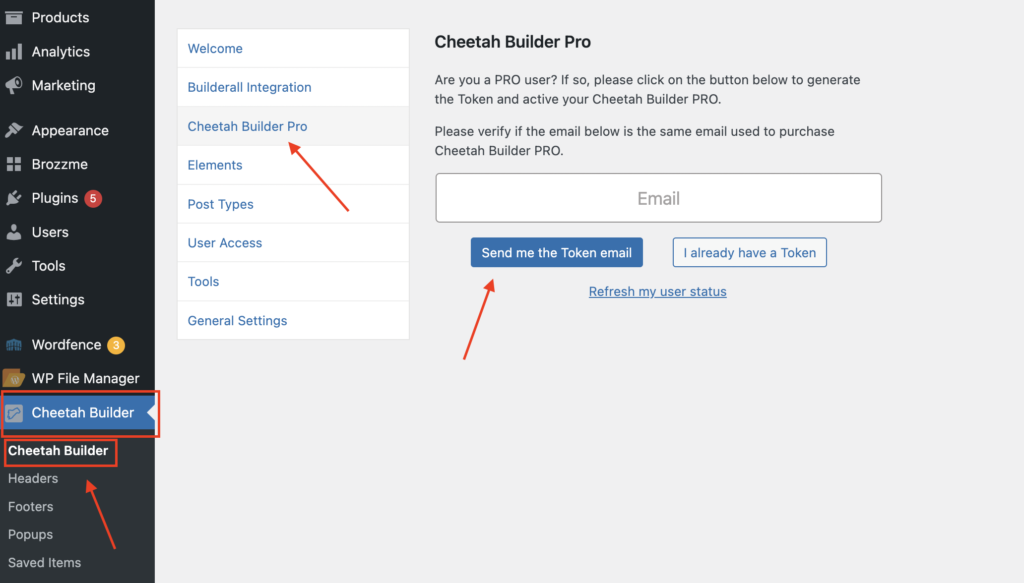
To upgrade to pro, go to “Cheetah Builder” and then “Cheetah Builder” again. Select “Cheetah Builder Pro” and then click “Send me the Token”

In the email field, add the email you used to purchase the plugin and click “Send me the Token email”
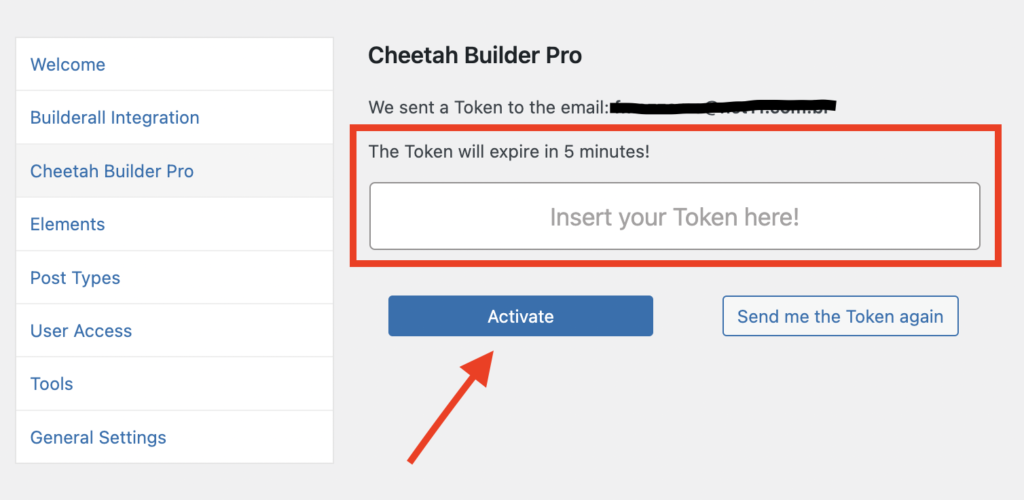
Check your email and you will receive a token. Come back to this screen and click “I have the Token” and enter the token you received from the email.

NOTE: The token has a “time to live” of only 5 minutes, so be sure to enter the key within five minutes or you will need to request a new key.
This will upgrade you to the pro version and you can start using the Cheetah Builder with the advanced features.
FOR EXISTING BUILDERALL MEMBERS
To upgrade to pro, go to “Cheetah Builder” and then “Cheetah Builder” again. Select “Builderall Integration” and then click “Link with my Builderall Account”
Verify the account you are connecting to as a Builderall member. If it is incorrect, click “Sign in to another account”
If the account is correct, click “Authorize”
Congratulations. You are now upgraded to Cheetah Builder Pro for WordPress