- Before you start, you’ll need the following:
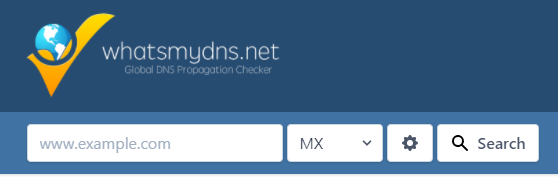
- Find the exact email server your domain uses in Builderall. To do that, you will need to go to this URL https://www.whatsmydns.net/#MX
- Type your domain in the field that shows, “www.example.com” and then click “Search”
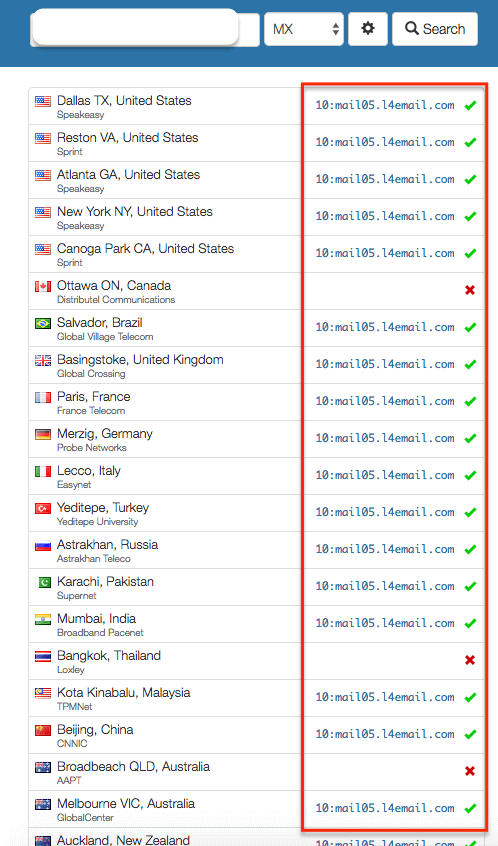
- You will see a result like this: 10:mailXX.l4email.com//
- (The XX means the number of your domain’s email server)
- In the example below, the email server is:
- mail05.l4email.com
You will also need
- Your email address: user@yourdomain.com
- Your email password.
- Through these instructions you will see references to “user” and “yourdomain.com” be sure to replace this with your actual username and domain name.
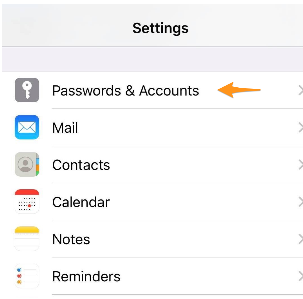
Step 1: From the Home screen, choose Settings.

Step 2: Tap Passwords & Accounts.
Step 3: In the Passwords & Accounts section, select Add Account.

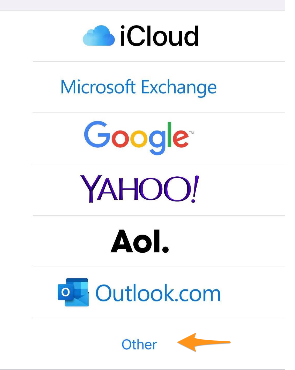
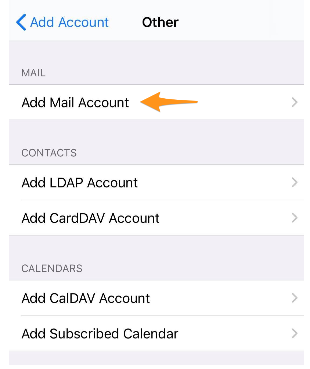
Step 4: Choose your email account type. For setting up email to work with Builderall professional emails, choose Other.
Step 5: Select Add Mail Account.
Step 6: Enter your Account Information. Then tap Next.
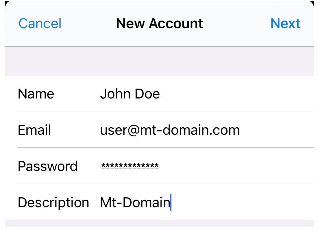
Step 7: Add the following information
- Name: Your user’s first and last name.
- Email: Your full username (user@yourdomain.com).
- Password: Your email user’s password.
- Description: A personal description (this does not have a functional effect on your email).
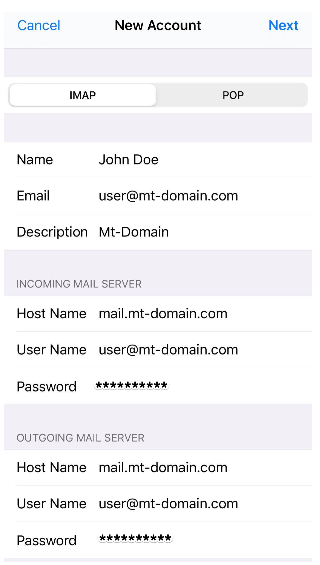
Step 8: Add the following information:
- Ensure IMAP is selected at the top.
- Name: Your user’s first and last name.
- Email: Your full username (user@yourdomain.com).
- Description: A personal description.
- INCOMING MAIL SERVER:
- Host Name: mailXX.l4email.com
- User Name: Your full username (user@yourdomain.com).
- Password: Your email user’s password.
- OUTGOING MAIL SERVER:
- Host Name: mailXX.l4email.com
- User Name: Your full username (user@yourdomain.com).
- Password: Your email user’s password.
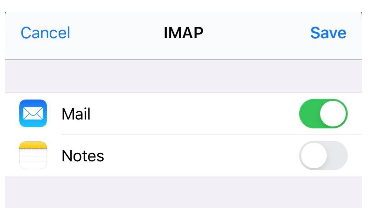
Step 9: Ensure that the Mail option is selected. You can also choose to sync Notes as well to your email user. Then click Save.
Congratulations! Your email account should be successfully added at this time. You can check your email through the Mail app in your iPhone.

Thank you for following this tour with me! If you have any questions or problems using the tool, our technical support team is always available to help you!
Please rate us by giving us your feedback. It is important to us.
Let your business take off🚀