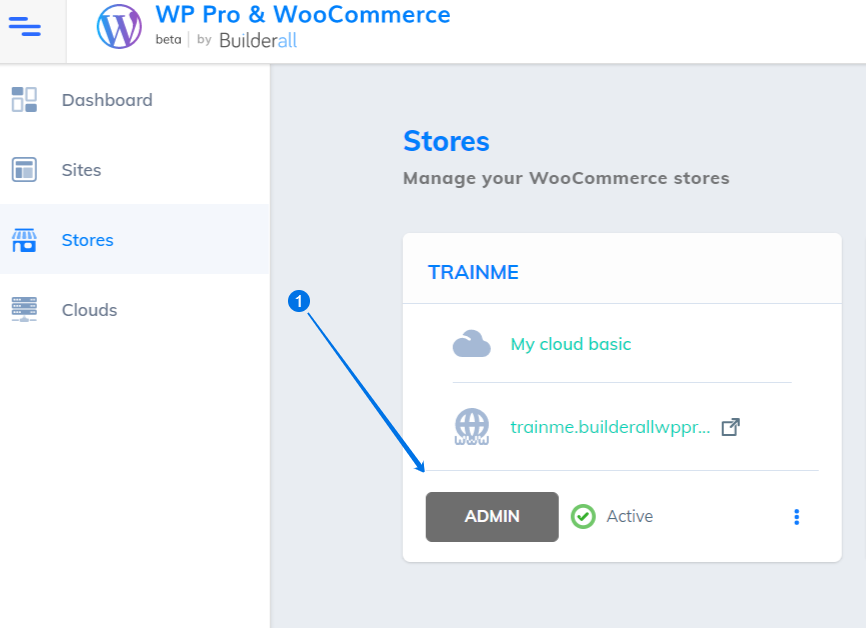
STEP 1:
- Create your WooCommerce Site then click on “Admin”.
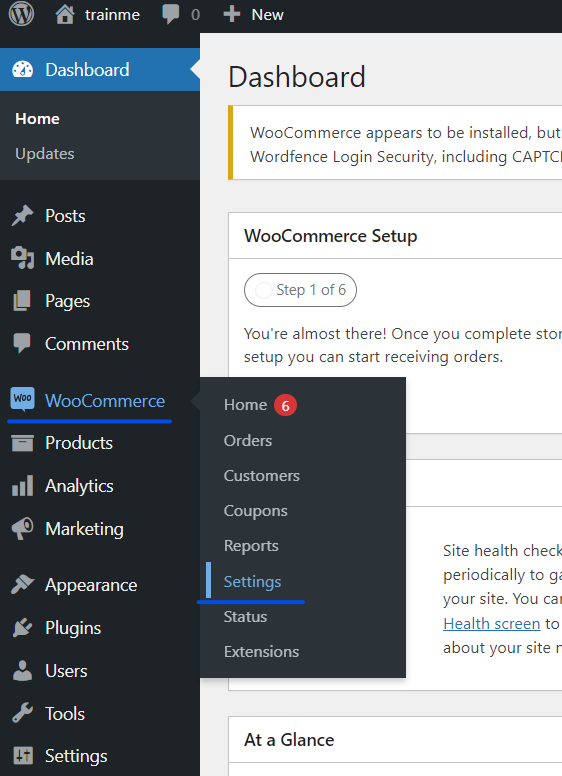
STEP 2:
Scroll to WooCommerce then Settings.
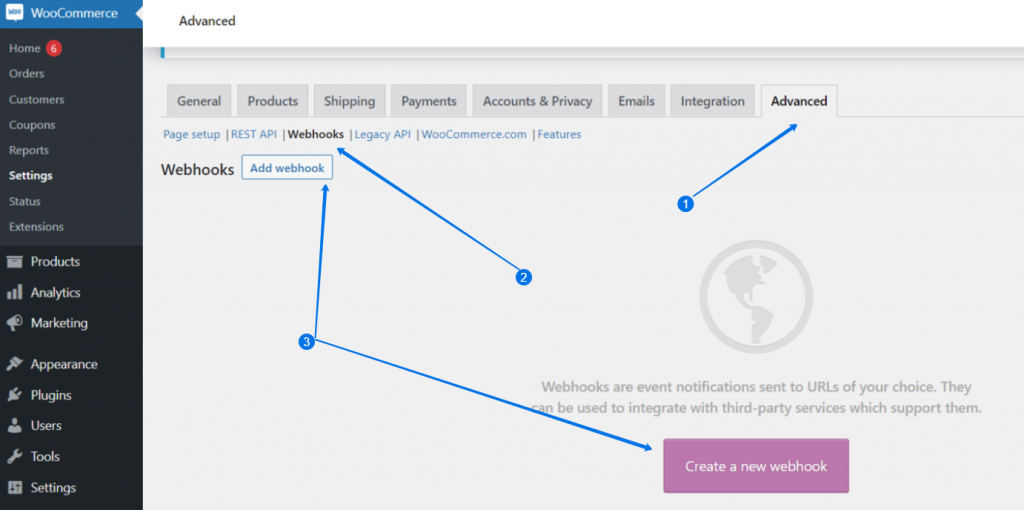
STEP 3:
- Click on “Advanced” tab.
- Choose “Webhooks”.
- Add “Webhook”.
STEP 4:
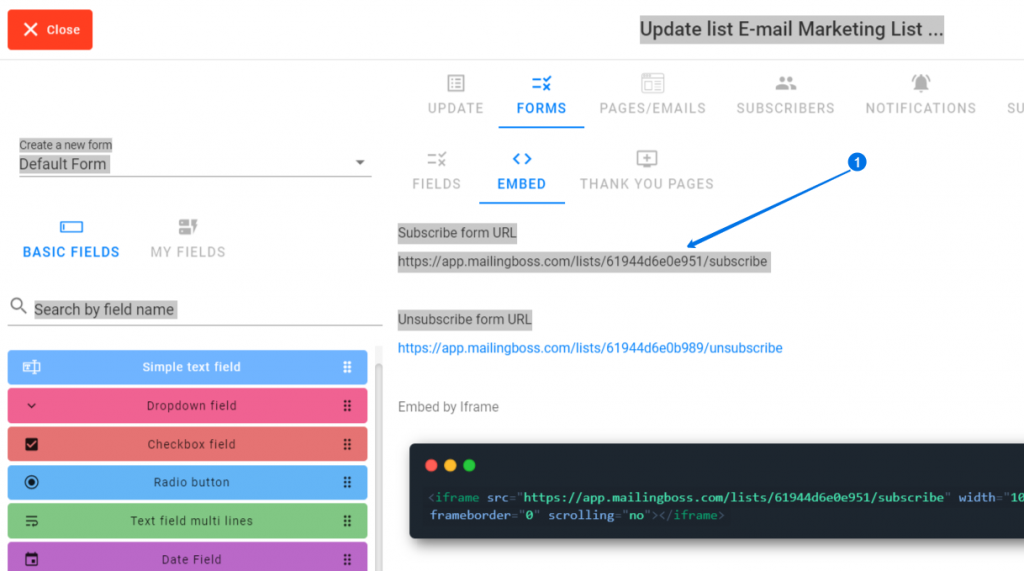
Go to Mailingboss 5.0 and create a list.
- Choose “Forms” then “Embed”. Keep this url tab open.
STEP 5:
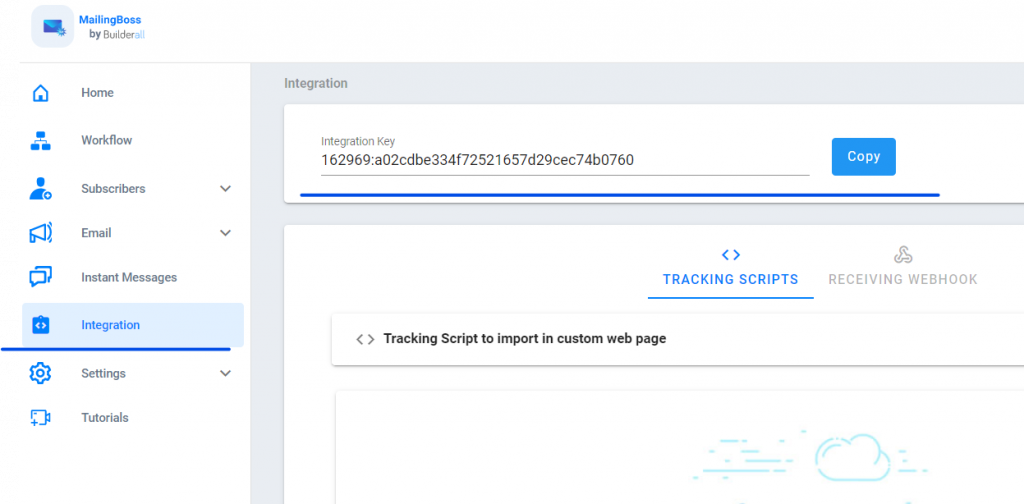
Go to Mailingoss 5.0 and on the left, scroll to Integration. Keep this tab open.
STEP 6:
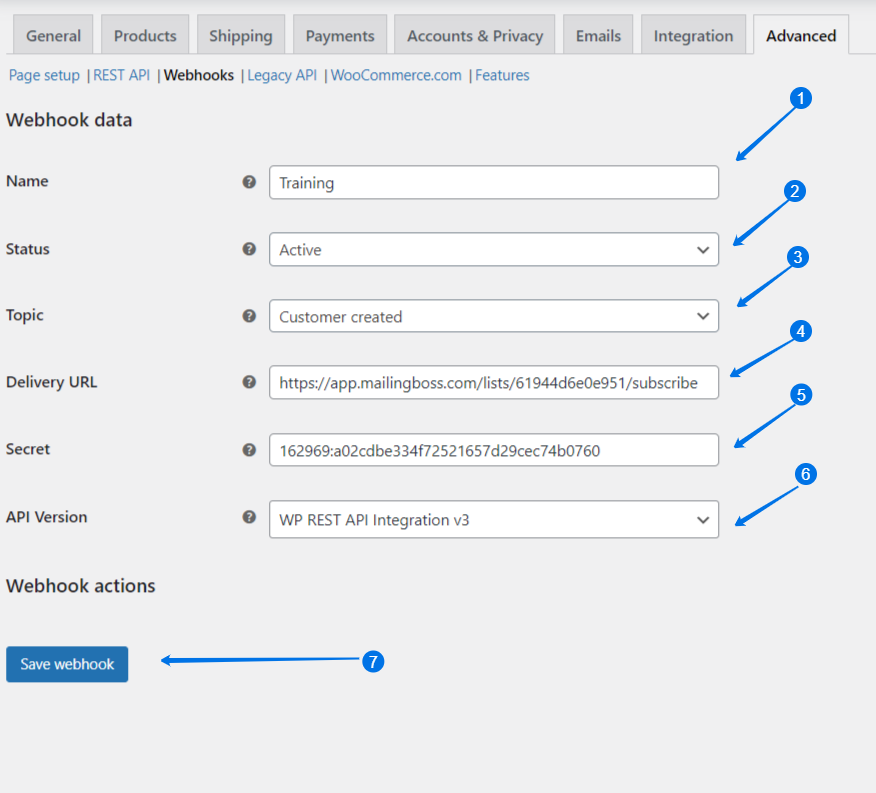
Go back to WooCommerce Settings and move to the “Advanced” tab.
- Give the Webhook a name.
- Choose from the dropdown arrow the Status.
- Choose the Topic from dropdown arrow.
- Copy the URL in Step 4 and paste it here.
- Copy the integration key in Step 5 and paste it here.
- Choose WP EST API Integration (Latest) from the dropdown arrow.
- Click “Save”
STEP 7:
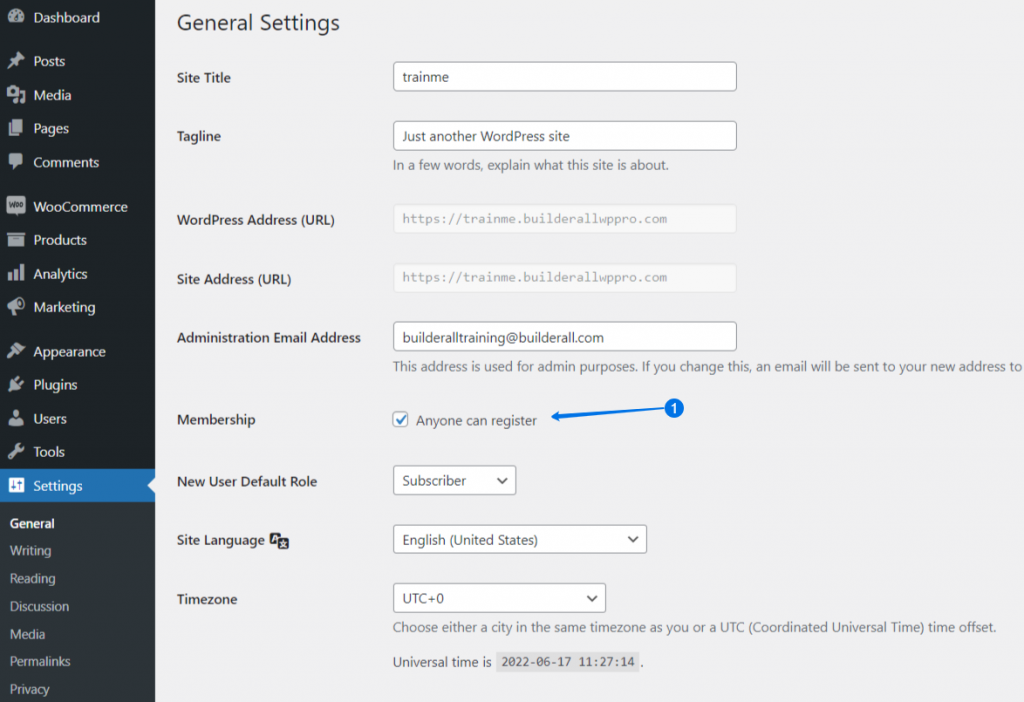
- Go to Settings – General and enable “Anyone can register”.
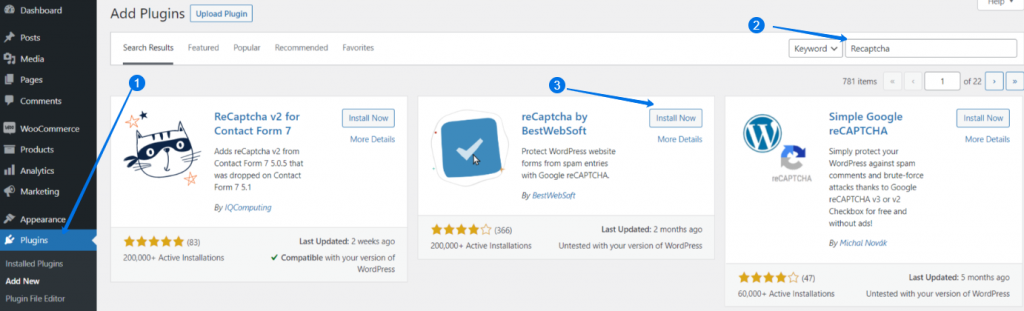
STEP 8:
- Go to Plugins.
- Search the keyword “Recaptcha”
- Install the Recaptcha.
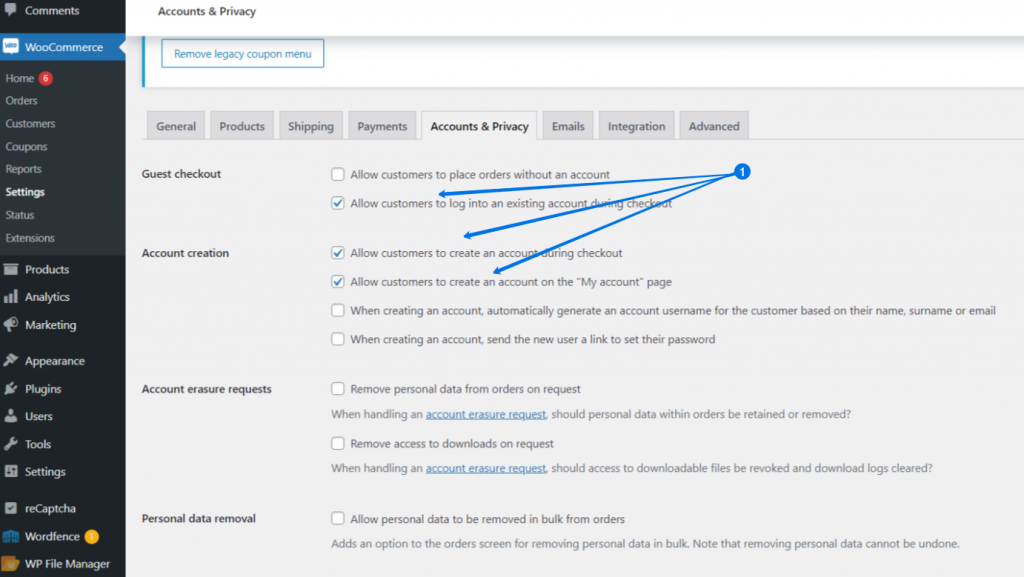
STEP 9:
- Go back to WooCommerce Settings and under the tab Accounts and Privacy, enable these three areas.
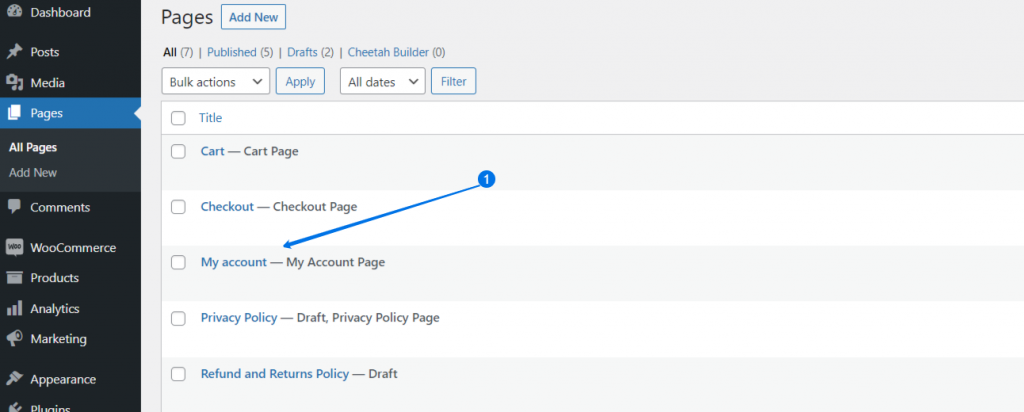
STEP 10:
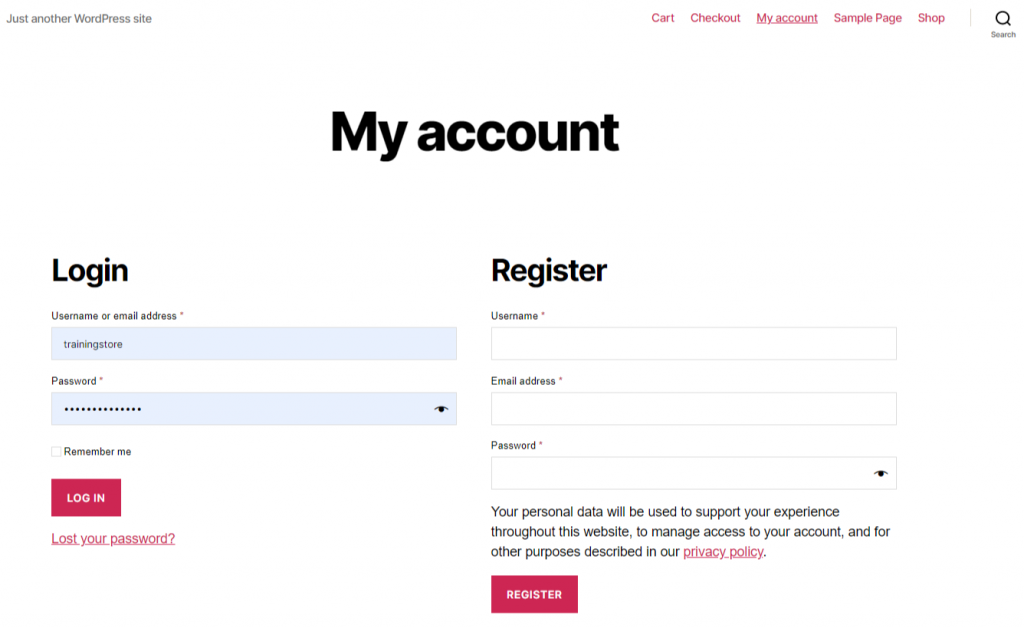
- Go to pages and view “My Account”.
STEP 11:
Your Login / Register is now connected with Mailingboss 5.0 List.
Always make sure to test.