It is recommended to connect your domain and create your custom email, and verify both before you create a list, because the list will need to be attached to a verified domain/email to ensure proper email delivery.
- How to connect my external domain (GoDaddy, Namecheap) to Builderall
- How to buy a domain from Builderall
- How to create a custom email and verify it in Mailingboss
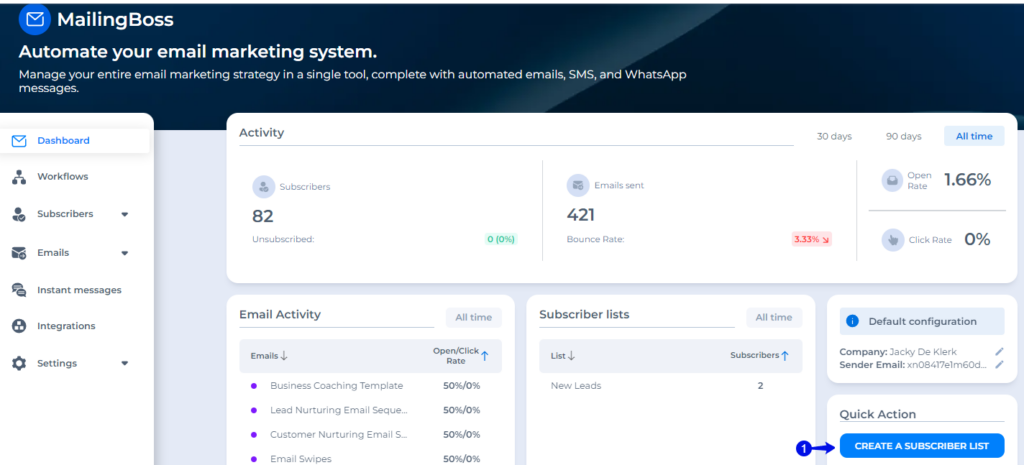
On your Mailingboss Dashboard is several ways in creating a Subscriber List, but in this tutorial we will use the Quick Action.
- Click on “Create a Subscriber List”.
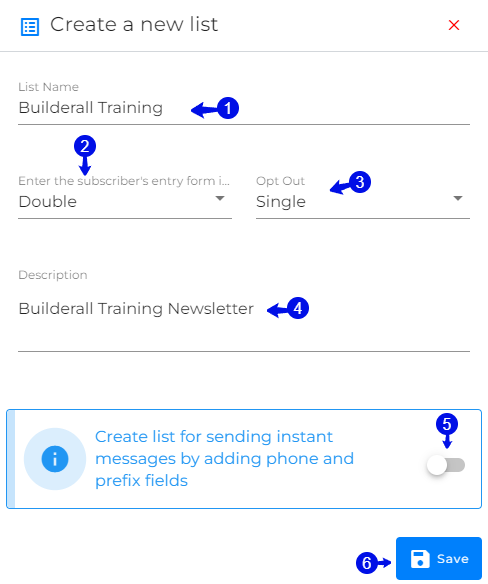
On the pop-up complete the following information:
- Give your list a name that you will recognise when you are going to attach it in other tools.
- You can choose single or double optin, but we recommend double optin. (See explanation below)
- Choose single opt out to make it easy for your subsribers to opt-out if they no longer want your emails.
- Give a description.
- If you are going to collect phone number to use for Whatsapp or SMS, then slide this to turn to blue.
- Click “Save”.
Double Optin vs Single Optin
Double opt-in, also known as confirmed opt-in, is an email marketing practice that requires users to confirm their subscription twice before they are added to an email list. Here are several reasons why double opt-in is important in email marketing:
- Verification of Intent: Double opt-in ensures that subscribers genuinely want to receive emails from you. It requires users to take an additional step to confirm their subscription, indicating a higher level of interest and intent.
- Reduces Spam and Bounces: By confirming their subscription, users verify the accuracy of their email addresses. This helps reduce the number of fake or mistyped email addresses, minimizing the chances of sending emails to invalid or non-existent addresses. This, in turn, helps improve deliverability rates and reduces the likelihood of your emails being flagged as spam.
- Compliance with Regulations: Double opt-in helps ensure compliance with anti-spam laws and regulations, such as the CAN-SPAM Act in the United States and the General Data Protection Regulation (GDPR) in Europe. These regulations often require businesses to obtain explicit consent from individuals before sending them marketing emails.
- Enhances Email List Quality.
There are multiple functions on this page such as:
- Forms: Here you can add additional fields to your form like dropdown list, checkboxes to get more information from the client, but the recommedation is to keep the form as simple as possible to avoid clients leaving your optin because to much information is required.
- Pages and Emails: Here you can change the pages and edit the emails that will be send when a person optin to your list. No changes is required here if you are linking your form in the Website Builderal to pages within your site.
- Subscribers: Here you will be able to see the status of your subscribers, sort and edit them.
- Notifications: If you want to be notified when a subscriber optin, you can do it here.
- Subscriber Import: You can import your subscriber list that you might have in this area.
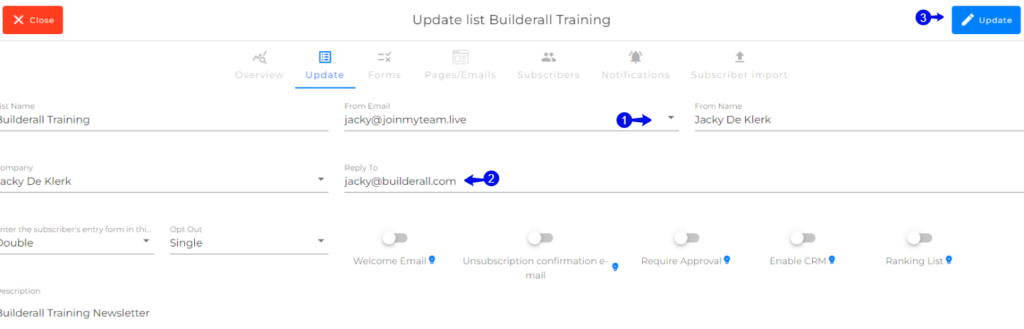
Most important part of creating a list is the following fields:
- If you have connected your domain and verified your email address, you will see it in the drop-down. Choose the verified email address.
- Choose a reply to email address if the subscriber want to send you a message back.
- Click “update” before you go to another tab, to apply the changes on this page.

Congratulations, you have successfully created an email list and is now ready to connect it to any tool within the Builderall Platform.
Jacky De Klerk – Success Coach